With coin control you have the ability to choose the outputs you’d like to be spent in transactions, and freeze the ones you’d prefer not to.
Step 1
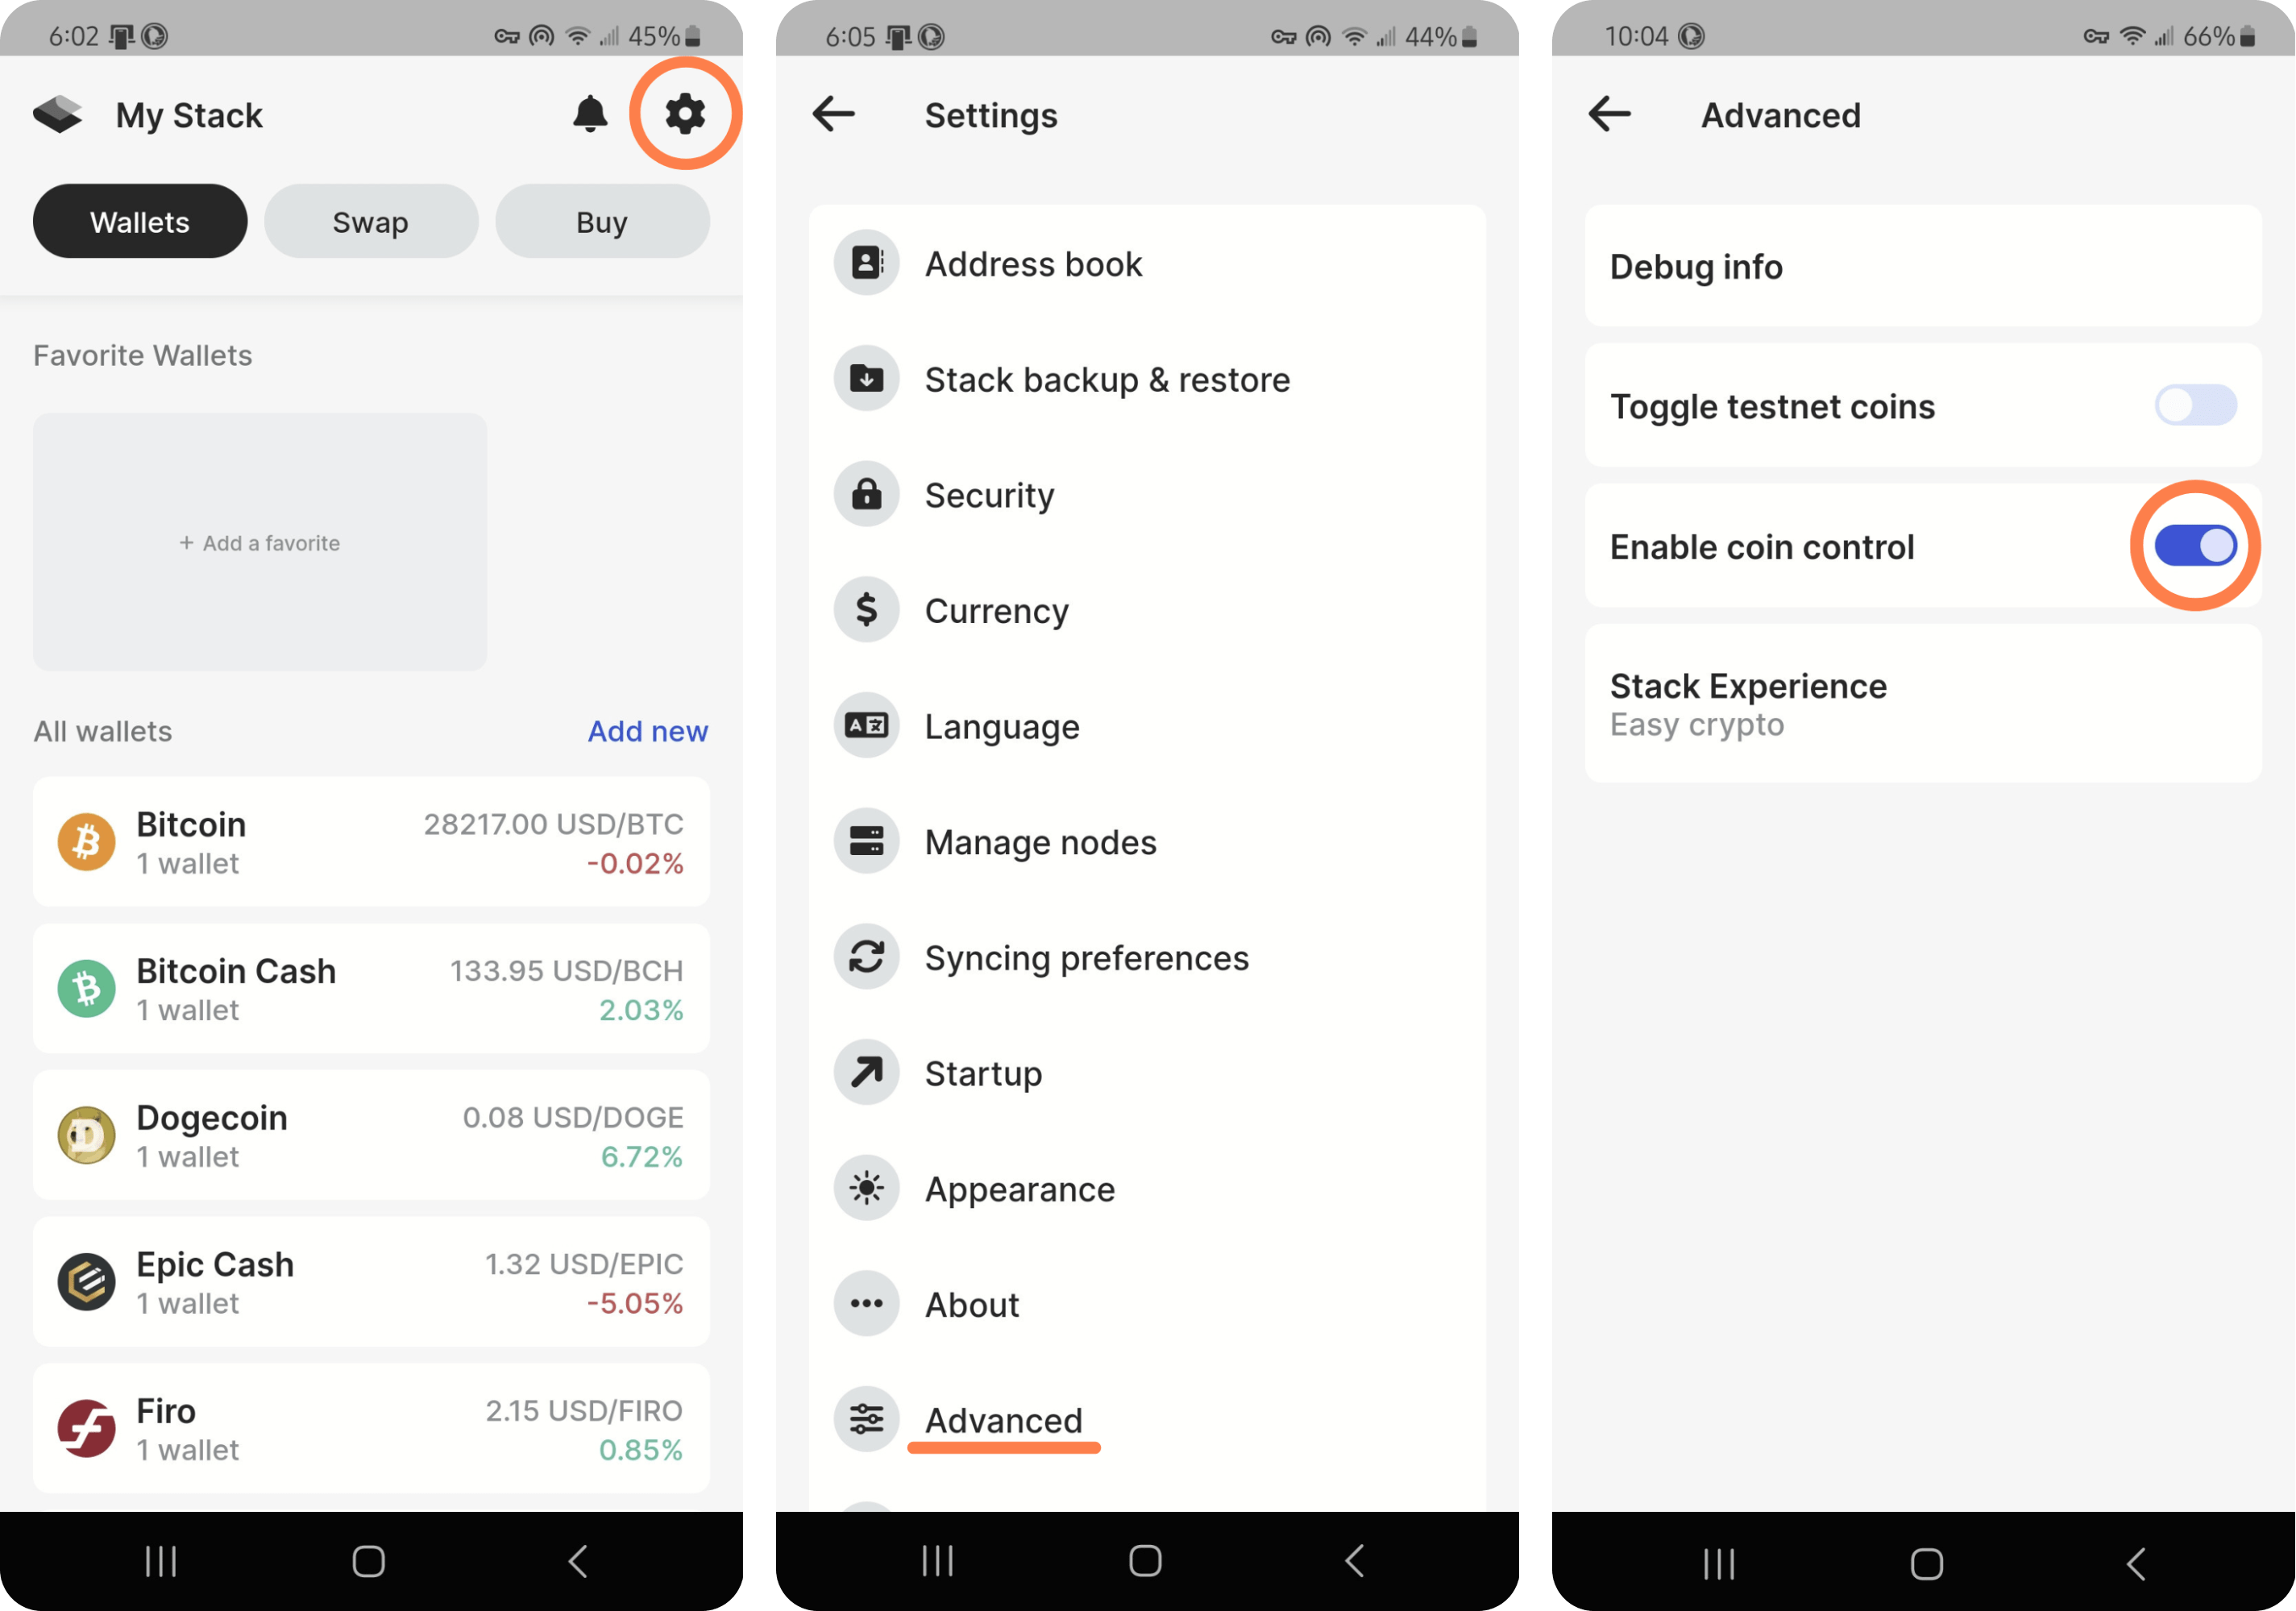
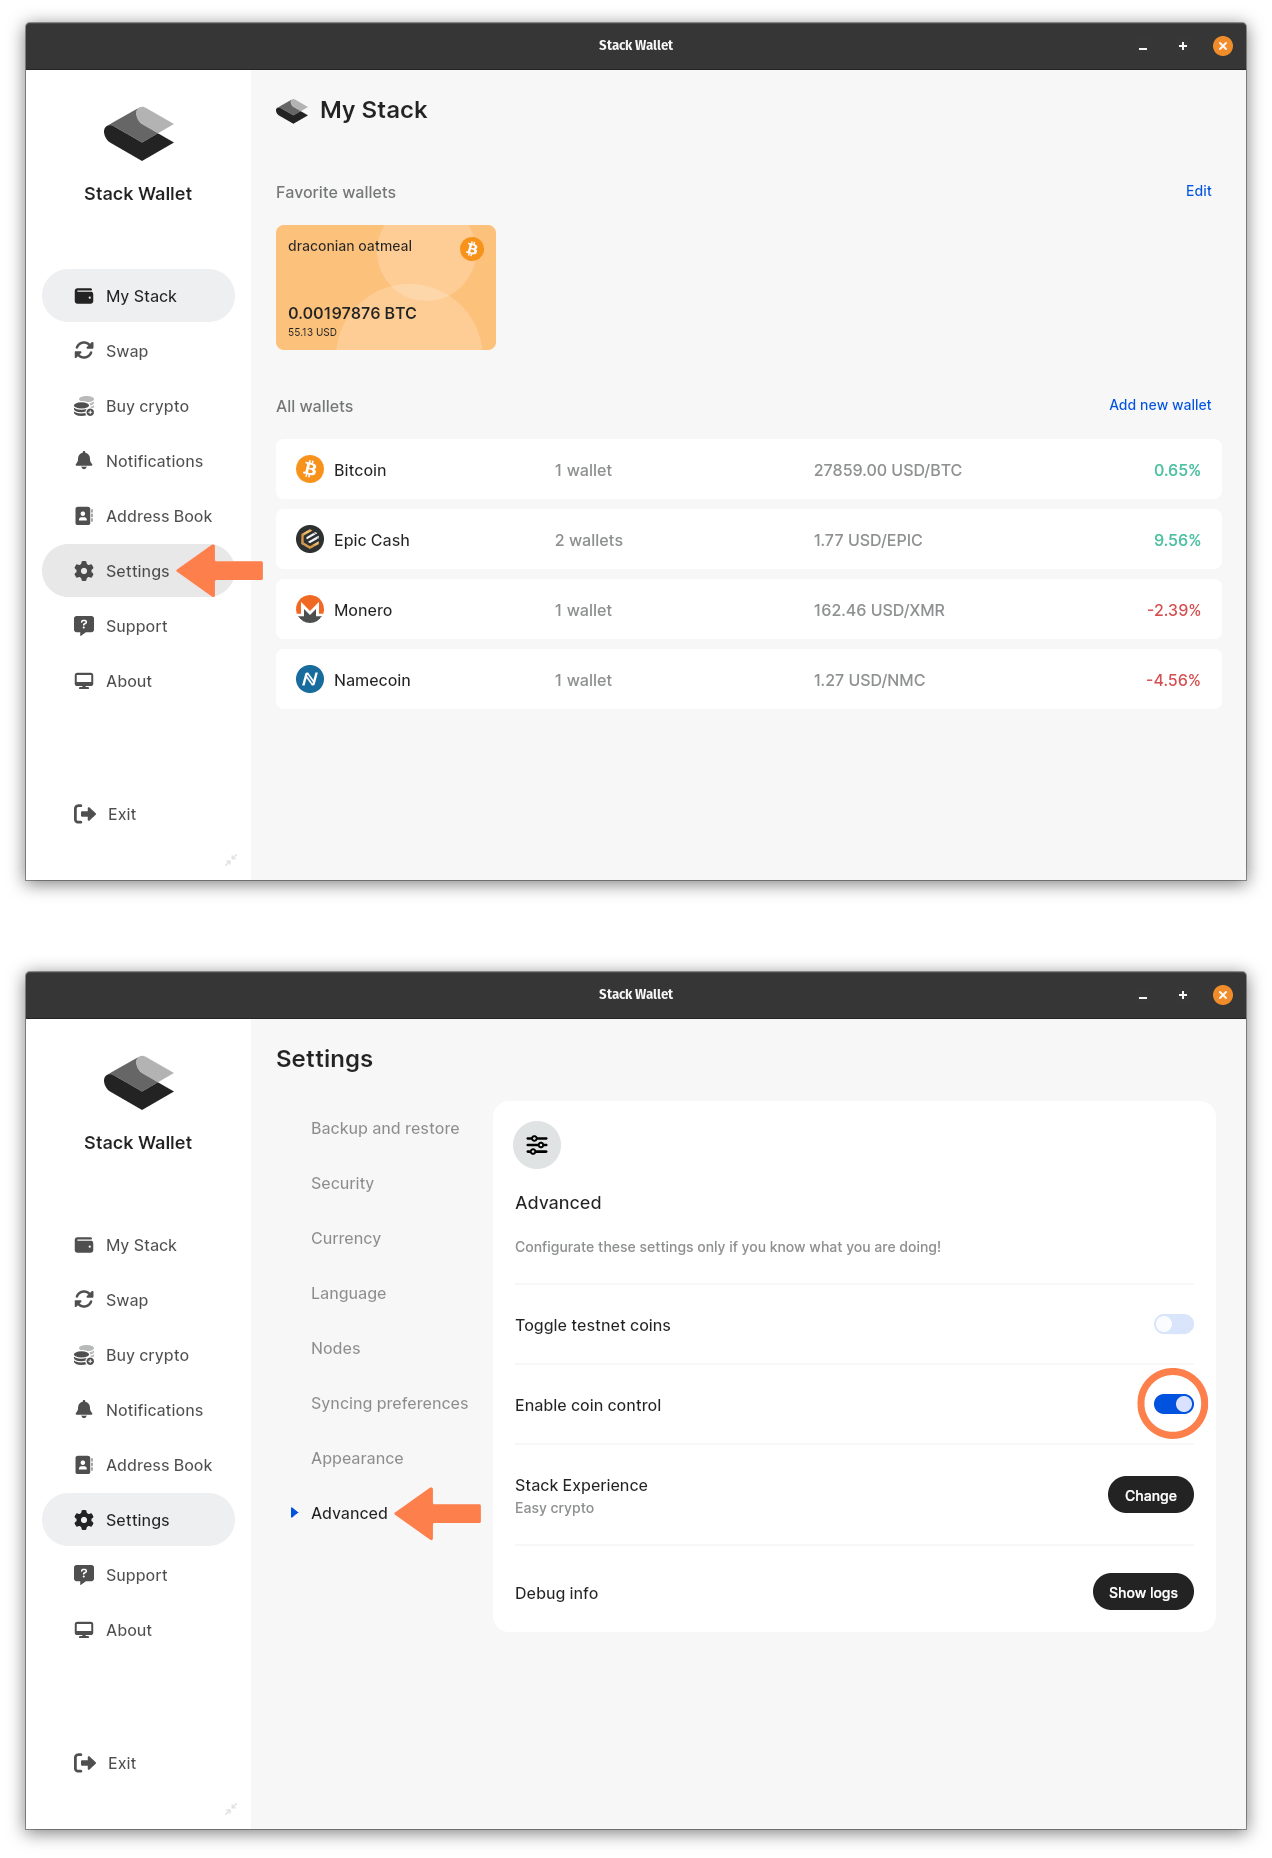
To get started, log into your app and navigate to the settings menu (gear button) at the top right. From here select Advanced near the bottom of the listed options. Once on this screen, make sure to toggle Enable Coin Control to ON.
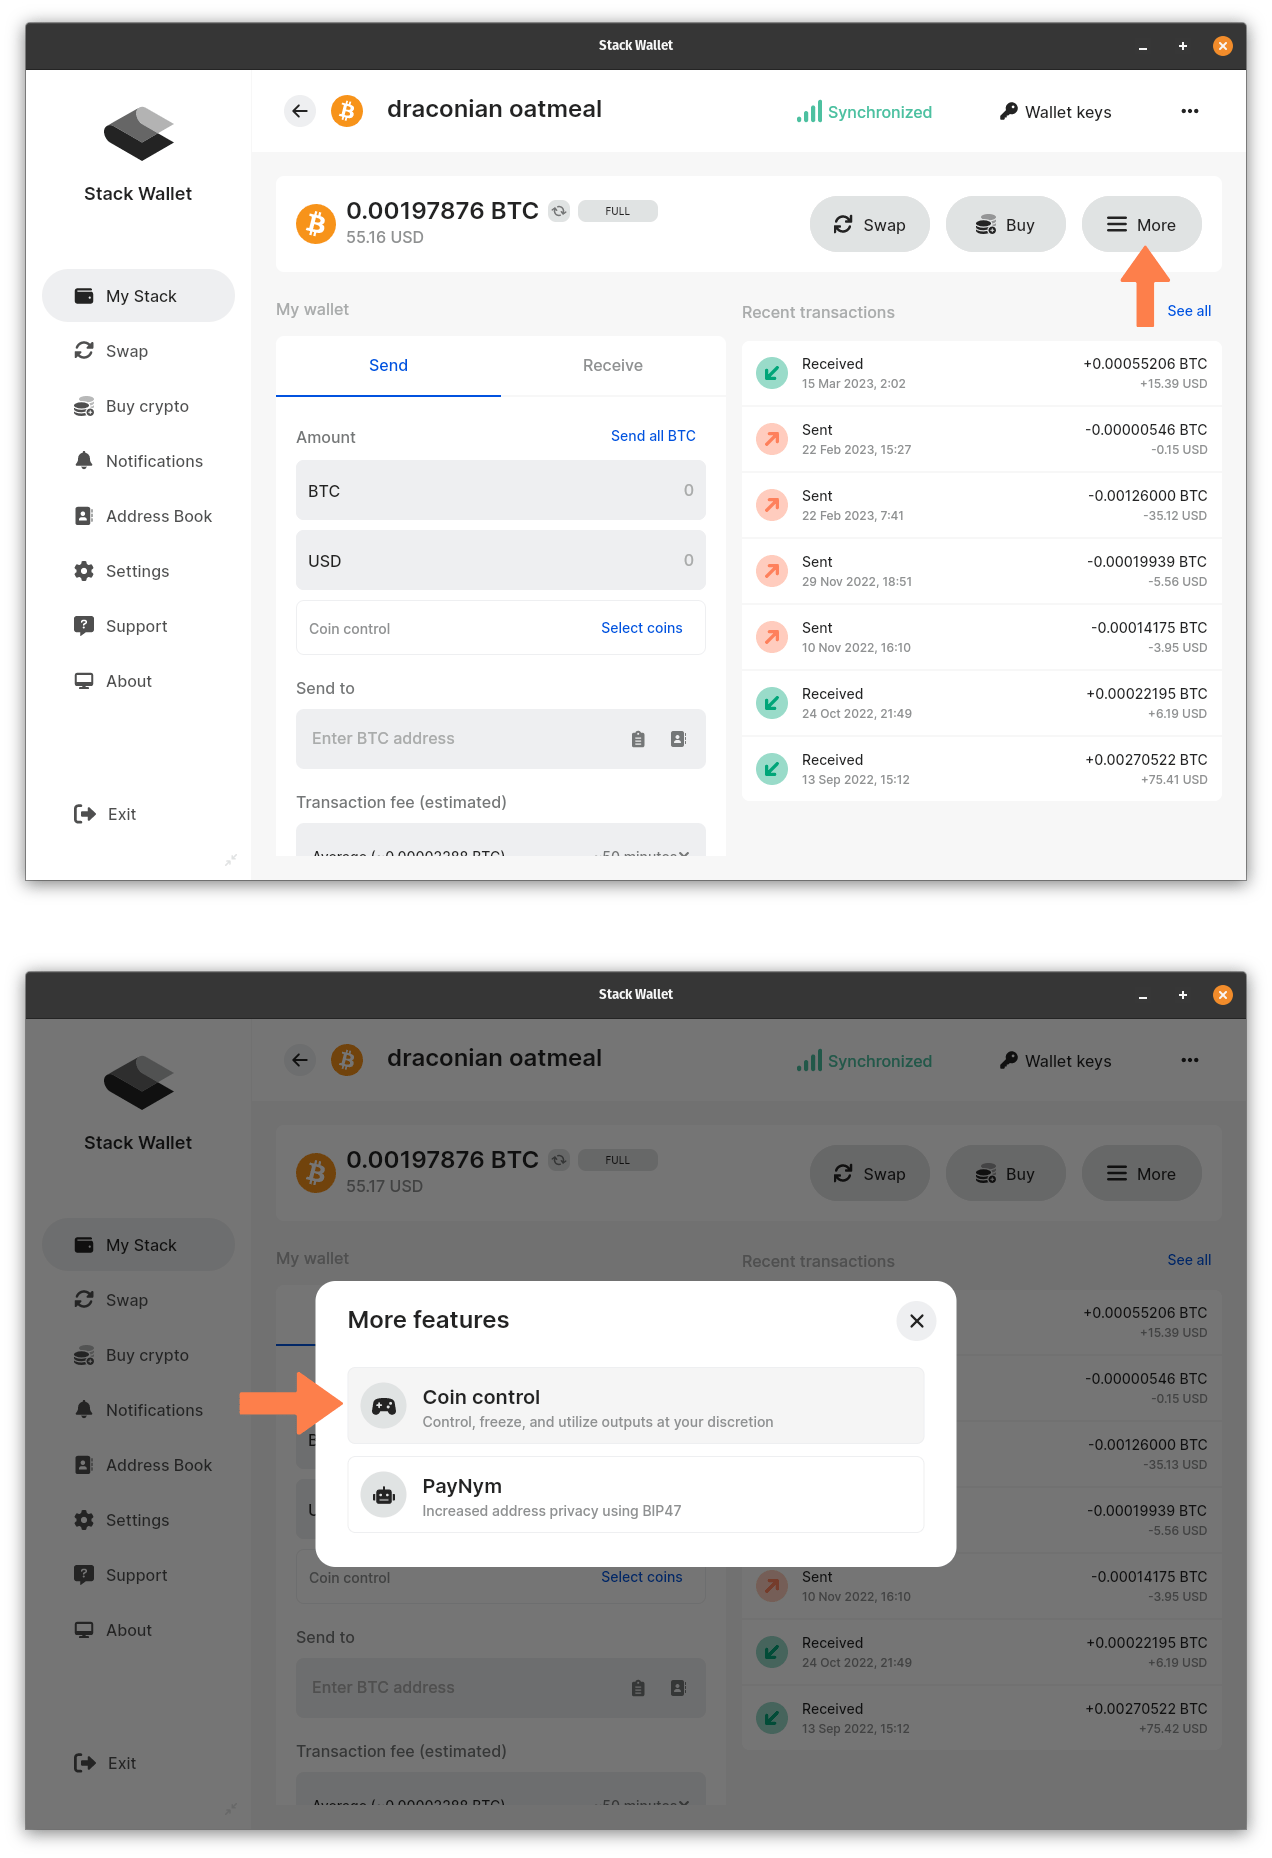
Desktop views will be shown beneath mobile views for each step.
Step 2
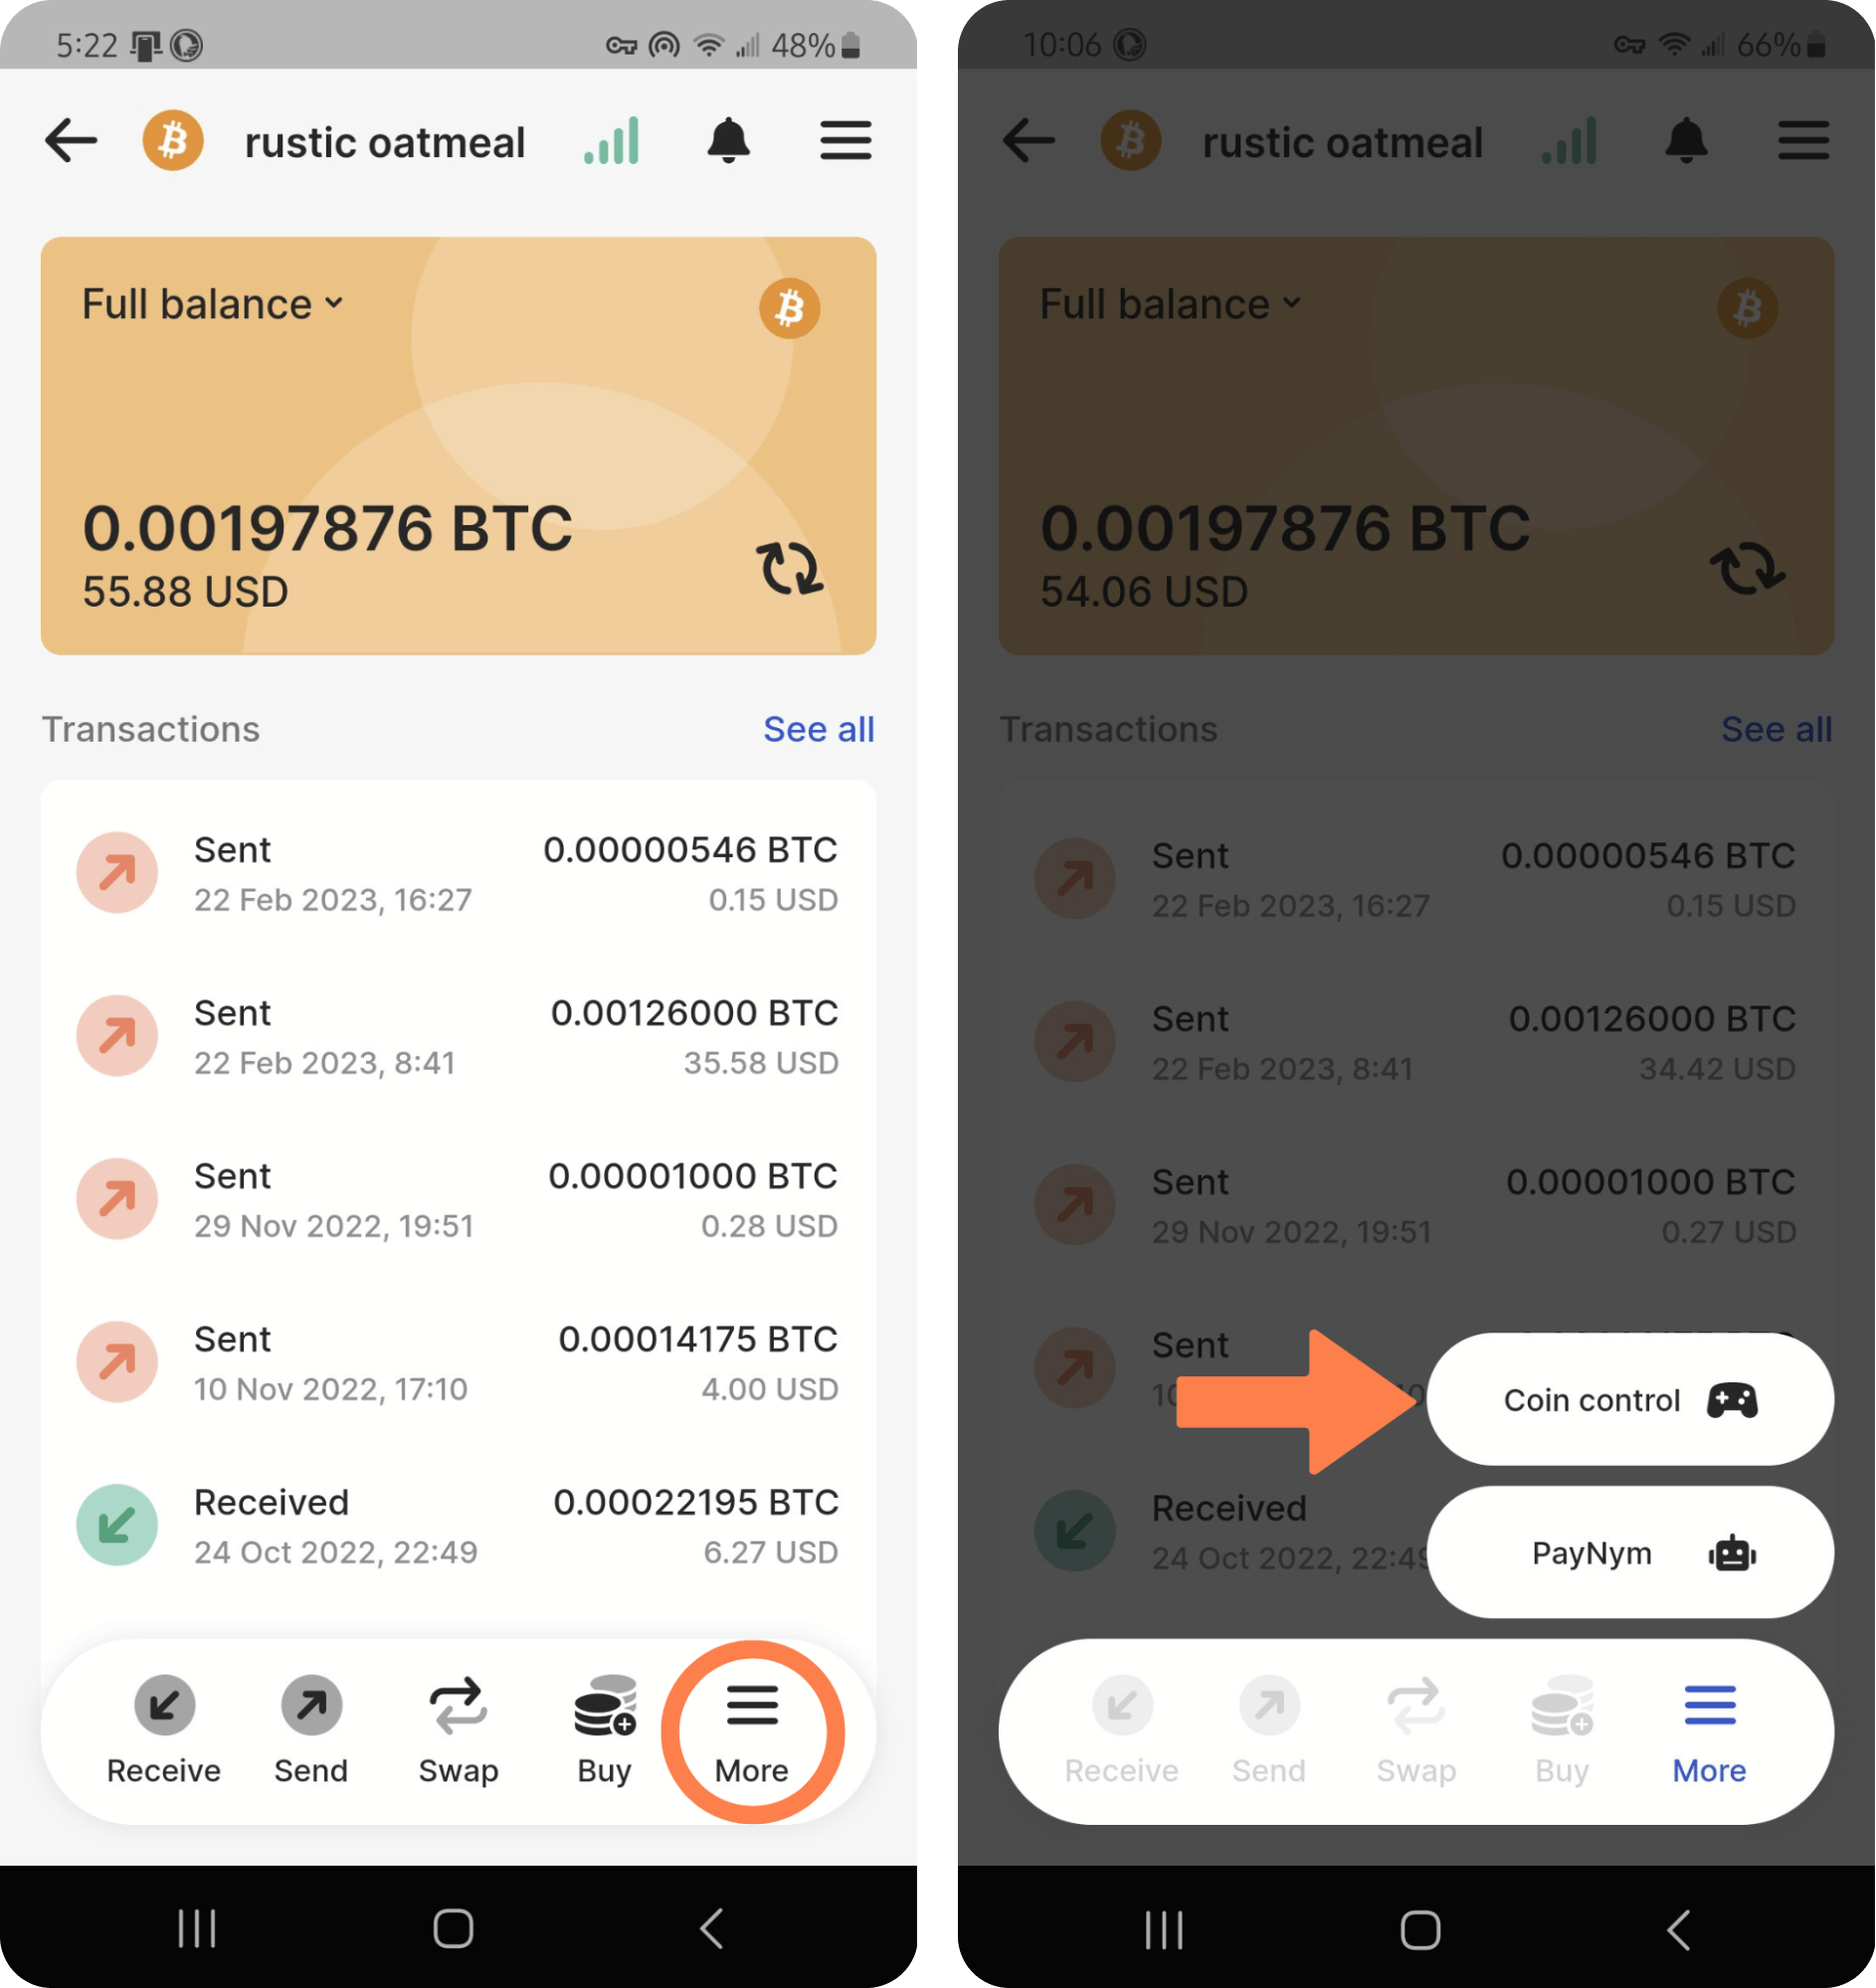
Afterwards head back to the main My Stack screen and open the wallet that you’d like to use (hint: must be coin control compatible, i.e. BTC, BCH, LTC, DOGE, NMC, or PART). Looking to the menu along the bottom of your wallet screen, select the More option and then Coin Control from there.
Step 3
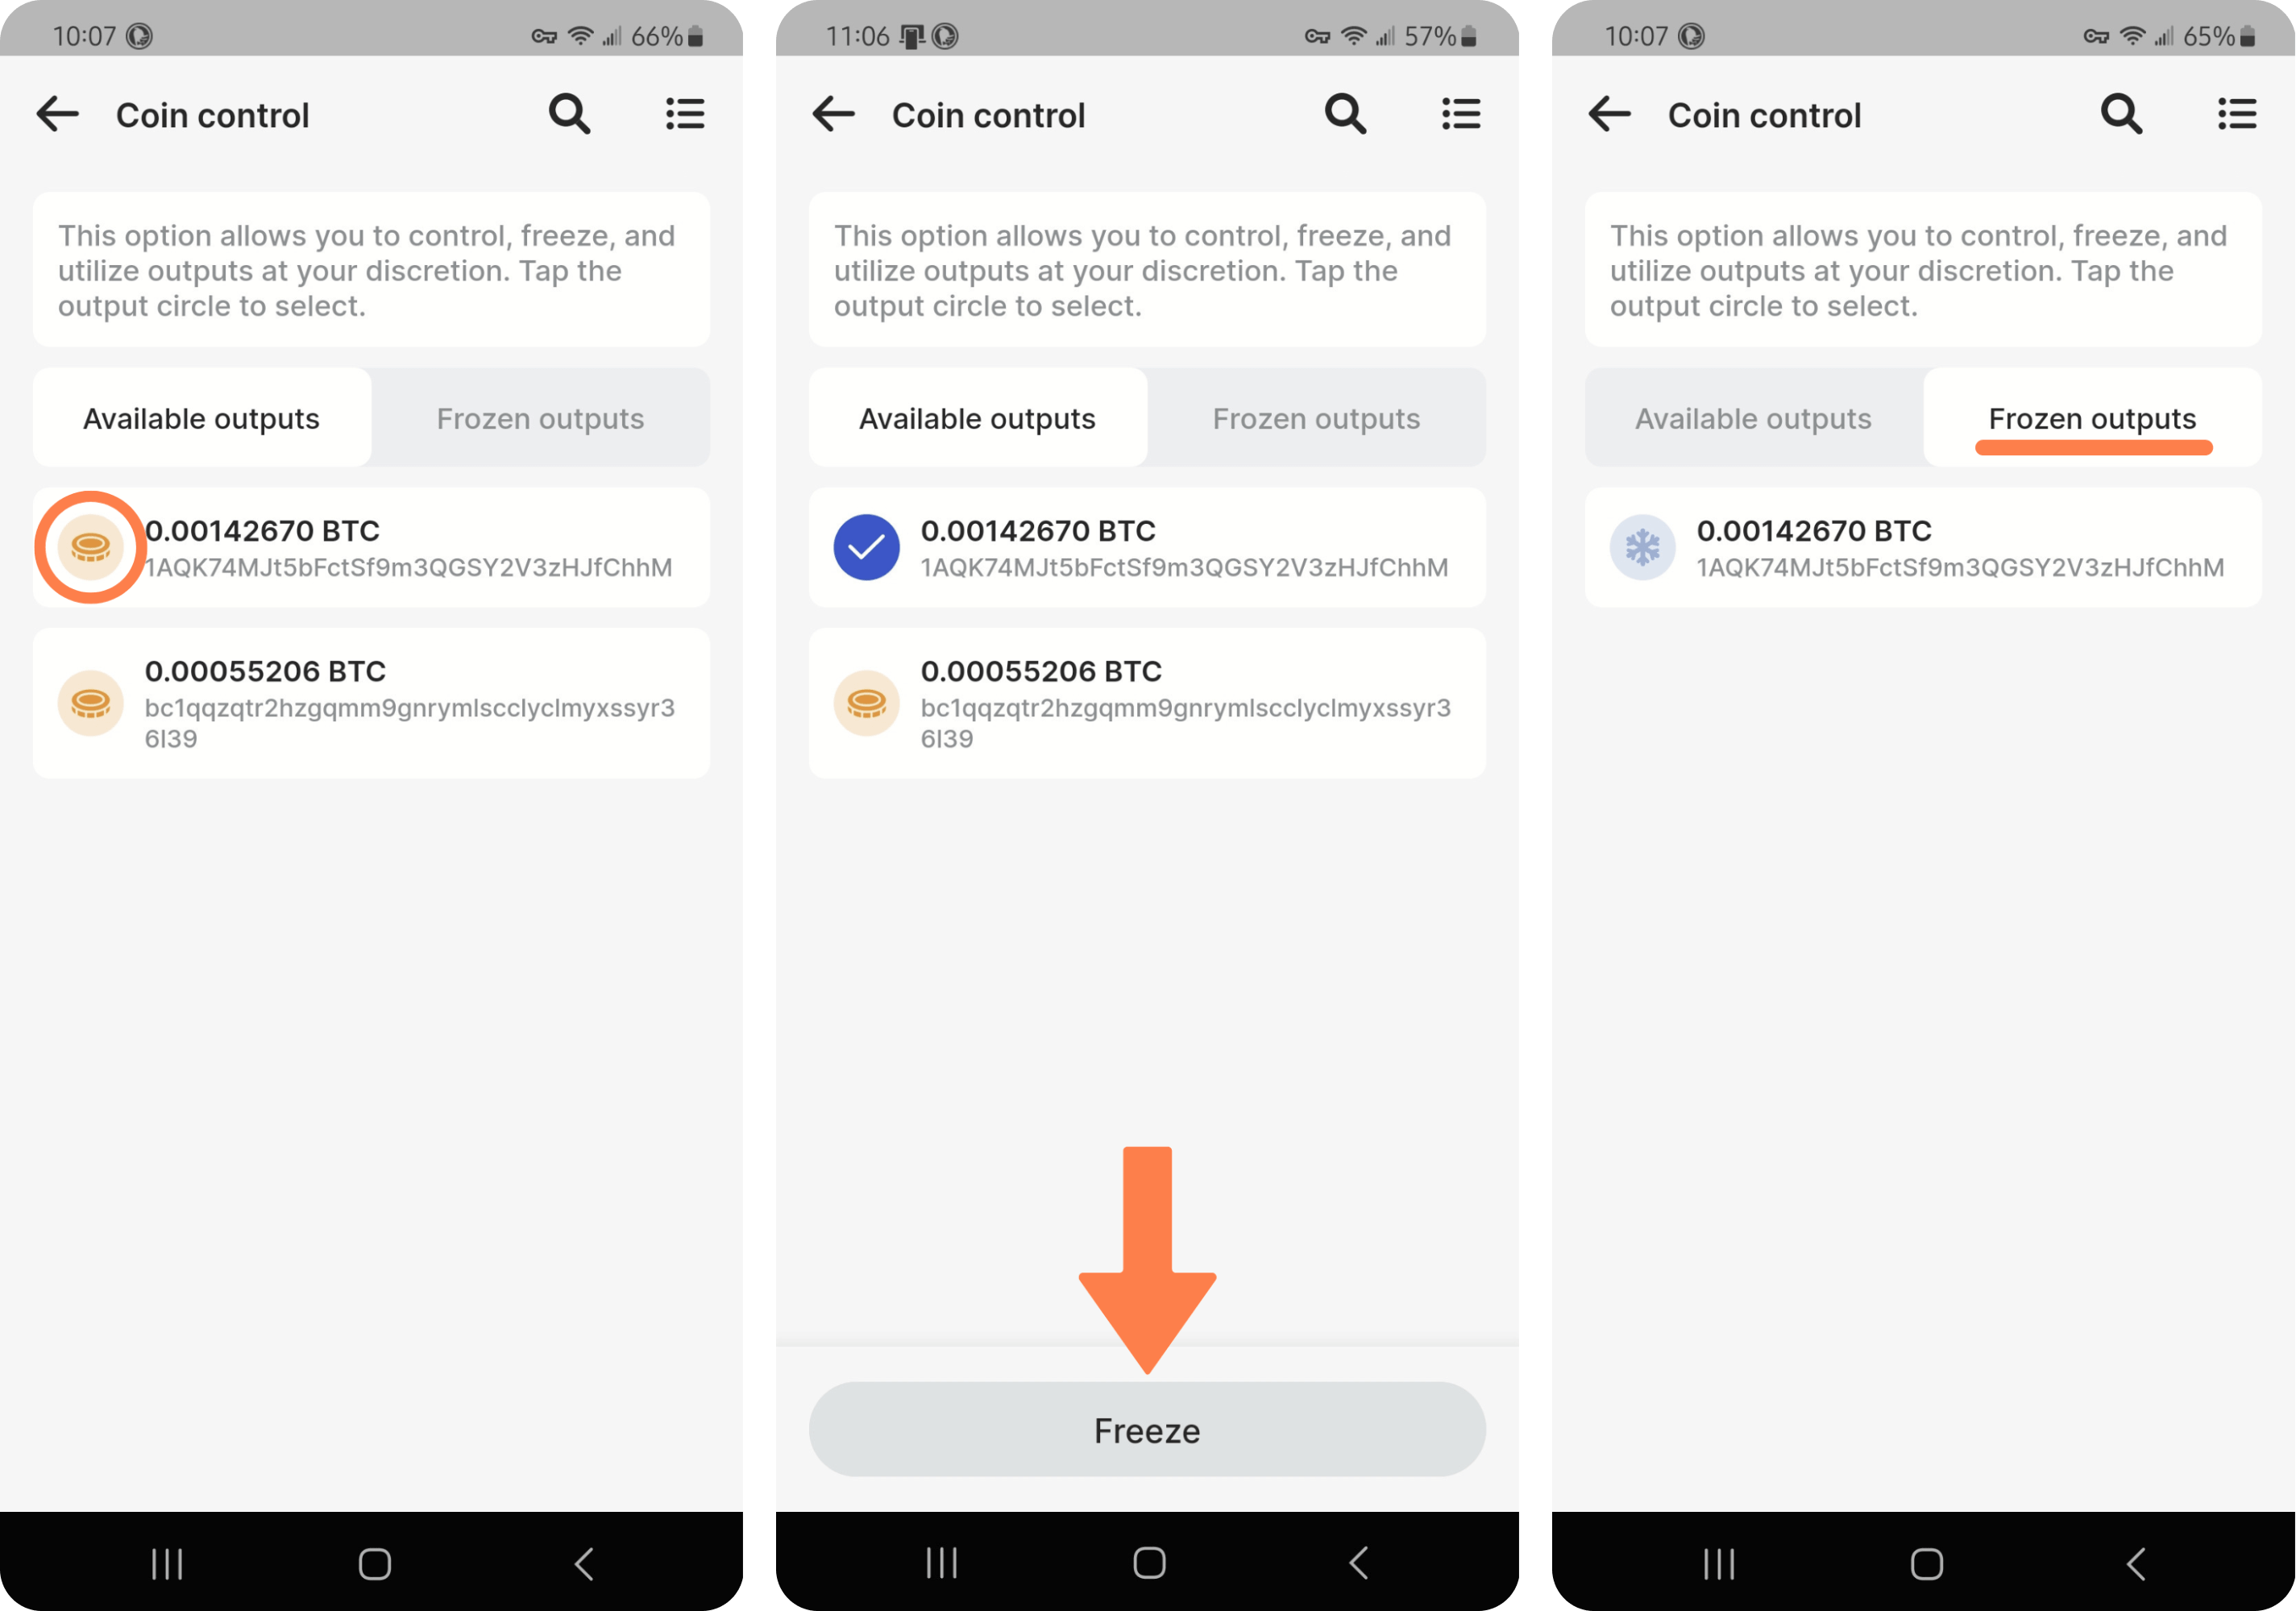
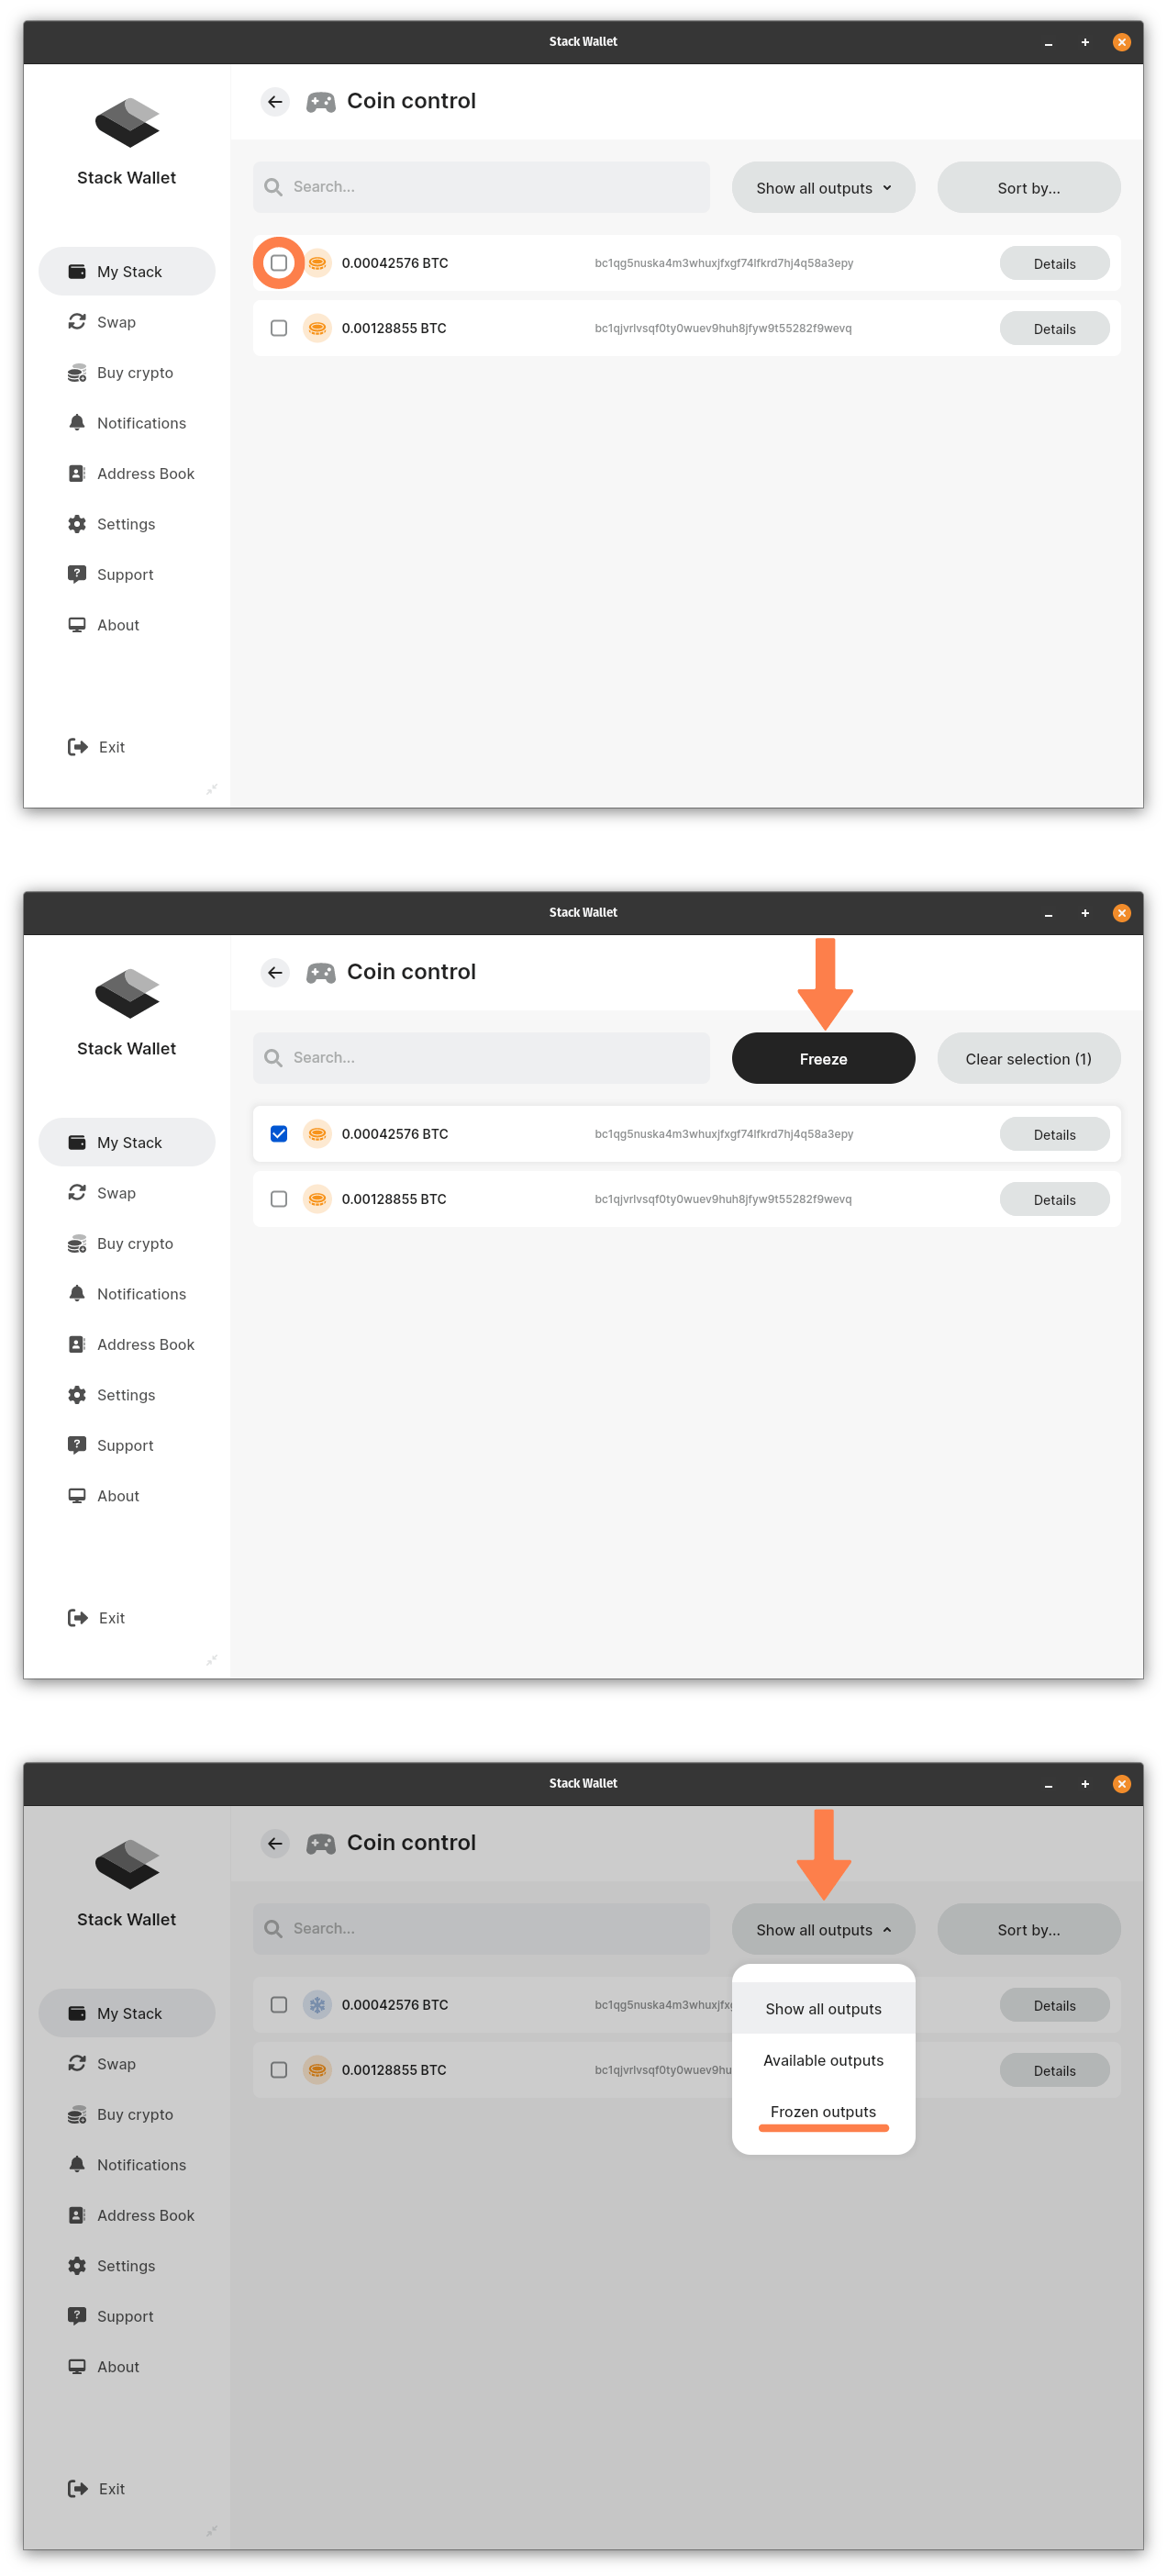
You should now be able to see the available (spendable) outputs in your wallet. You can also switch the view to Frozen Outputs to review or unfreeze any that have been made unavailable for spending. In order to select any of these outputs to change its status, simply touch/click on the coin symbol beside it and then freeze/unfreeze at the bottom of your screen.
Frozen outputs cannot be used for any future transactions until manually unfrozen. Because of this, the Available Balance in your wallet may reflect a lower amount than what can be seen in your Full Balance. When in doubt, always check for any frozen outputs that may have gone forgotten!
Step 4
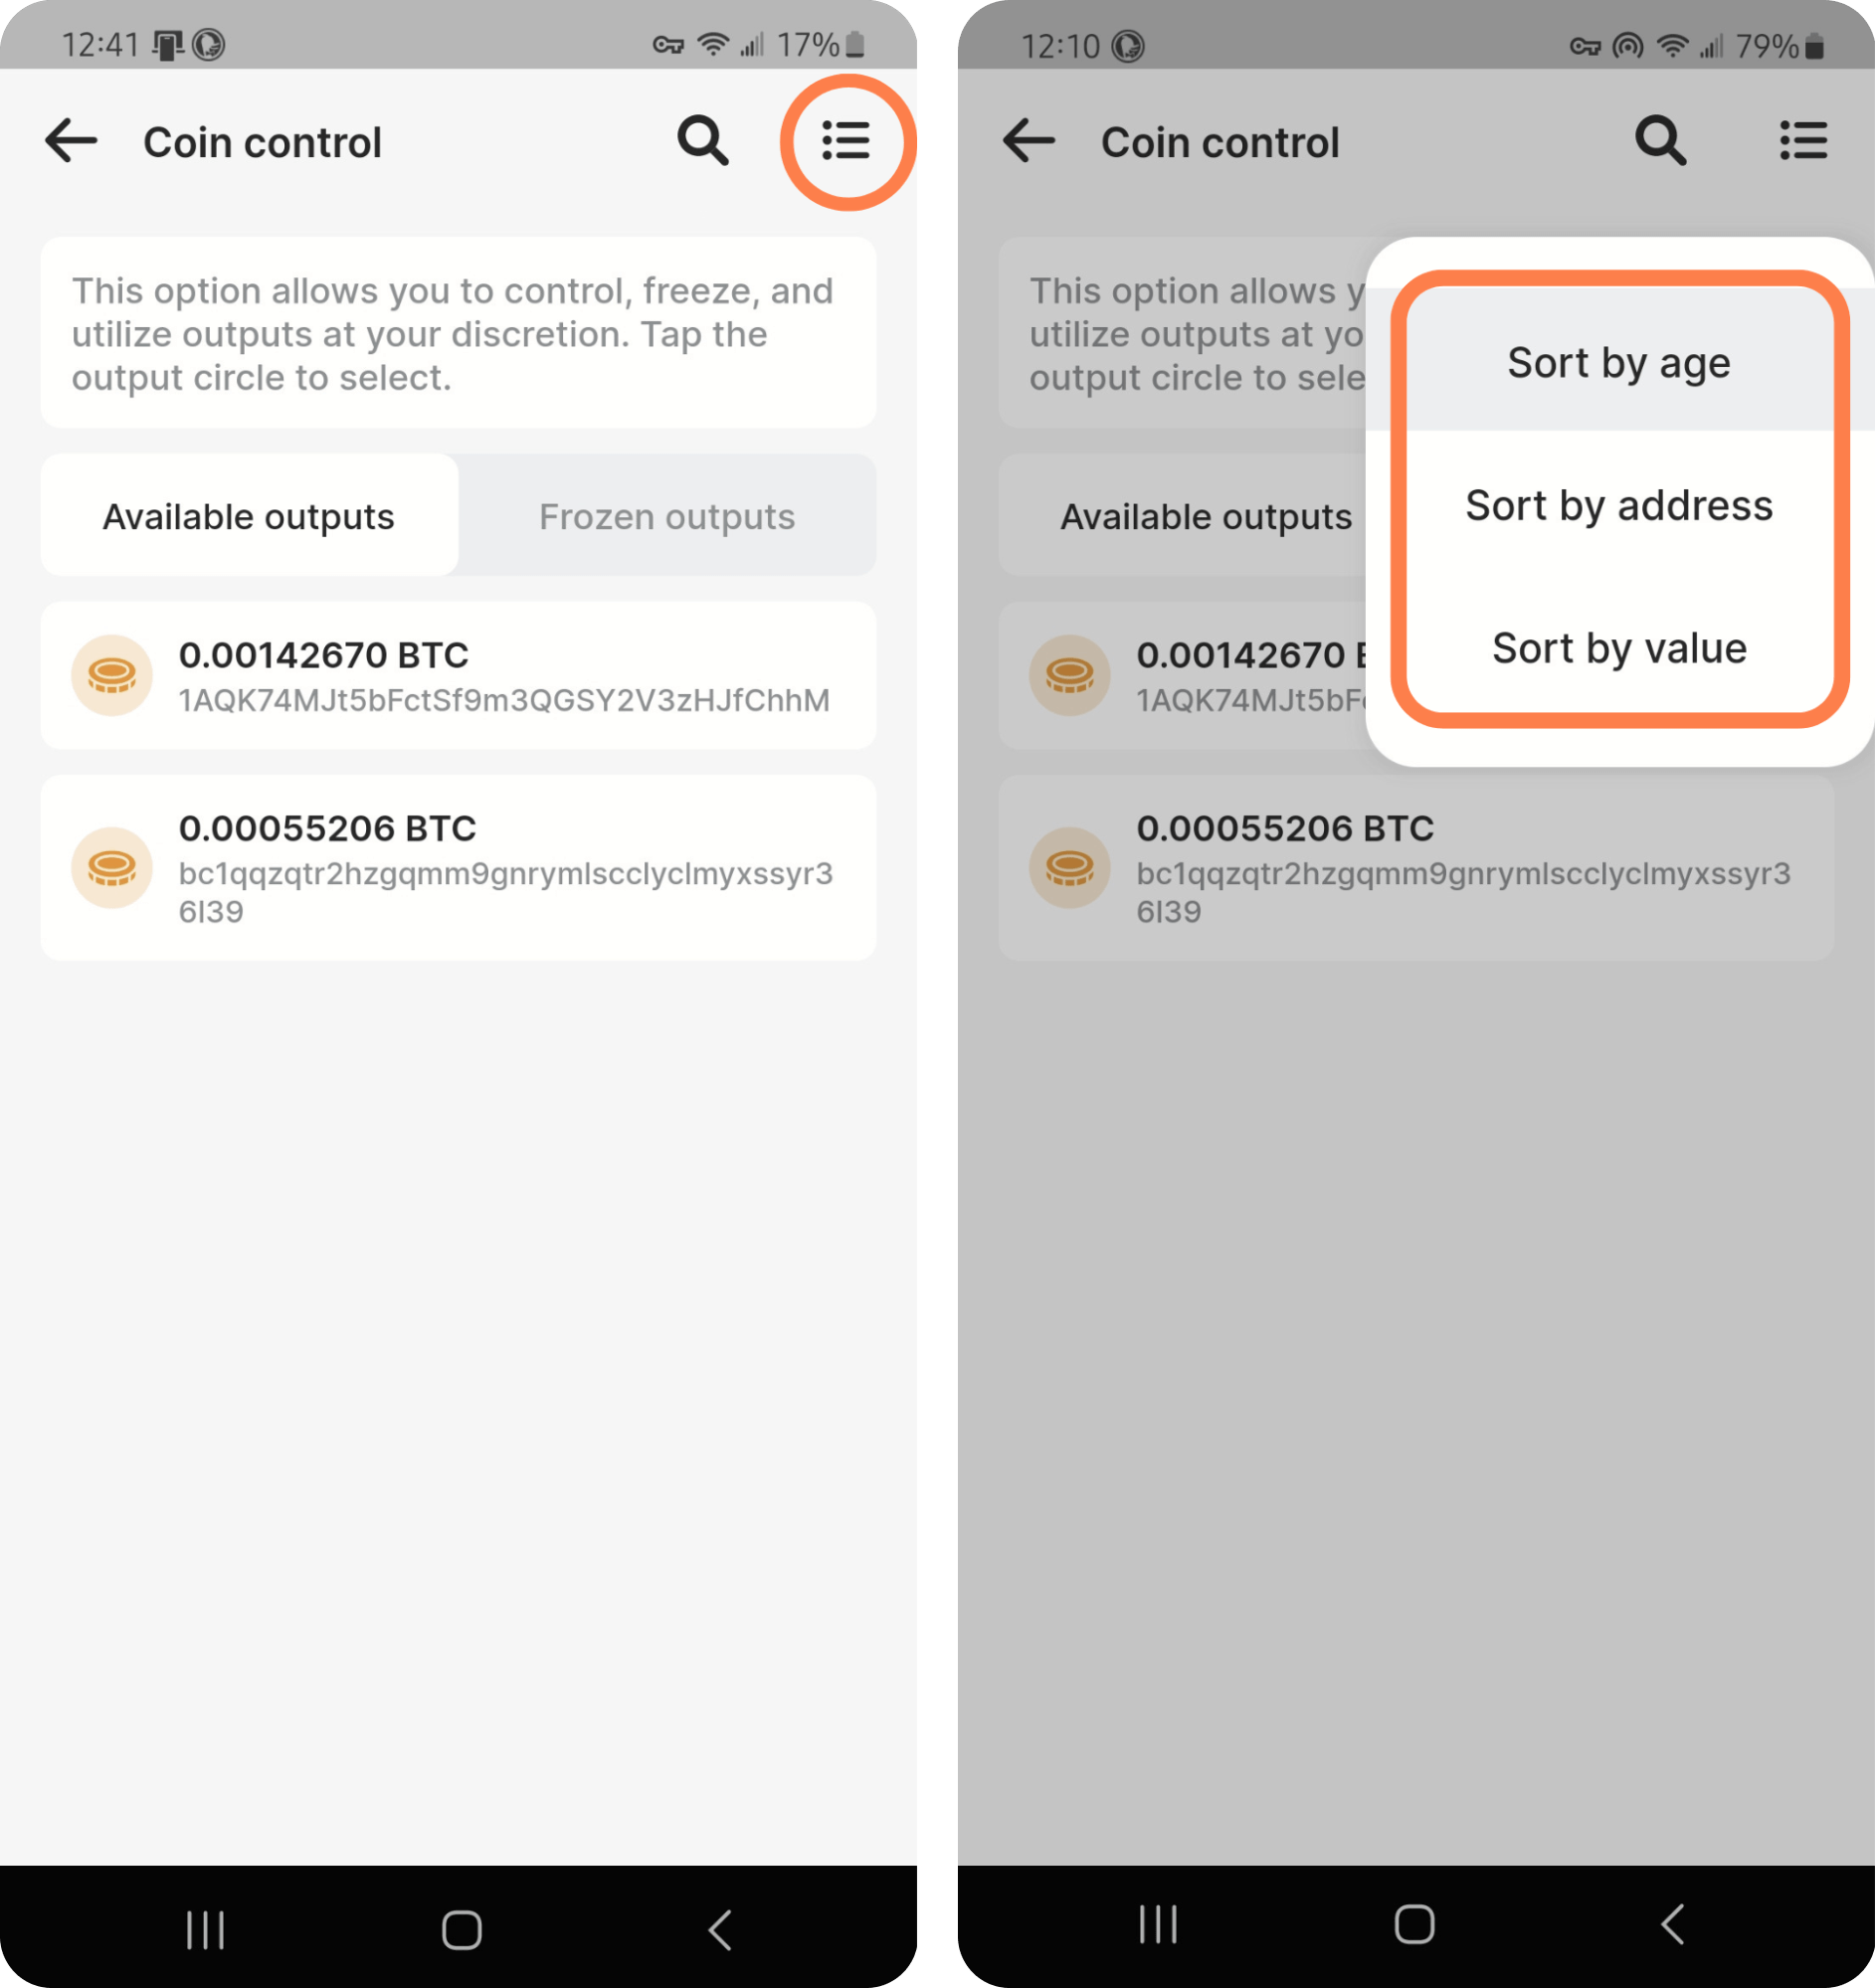
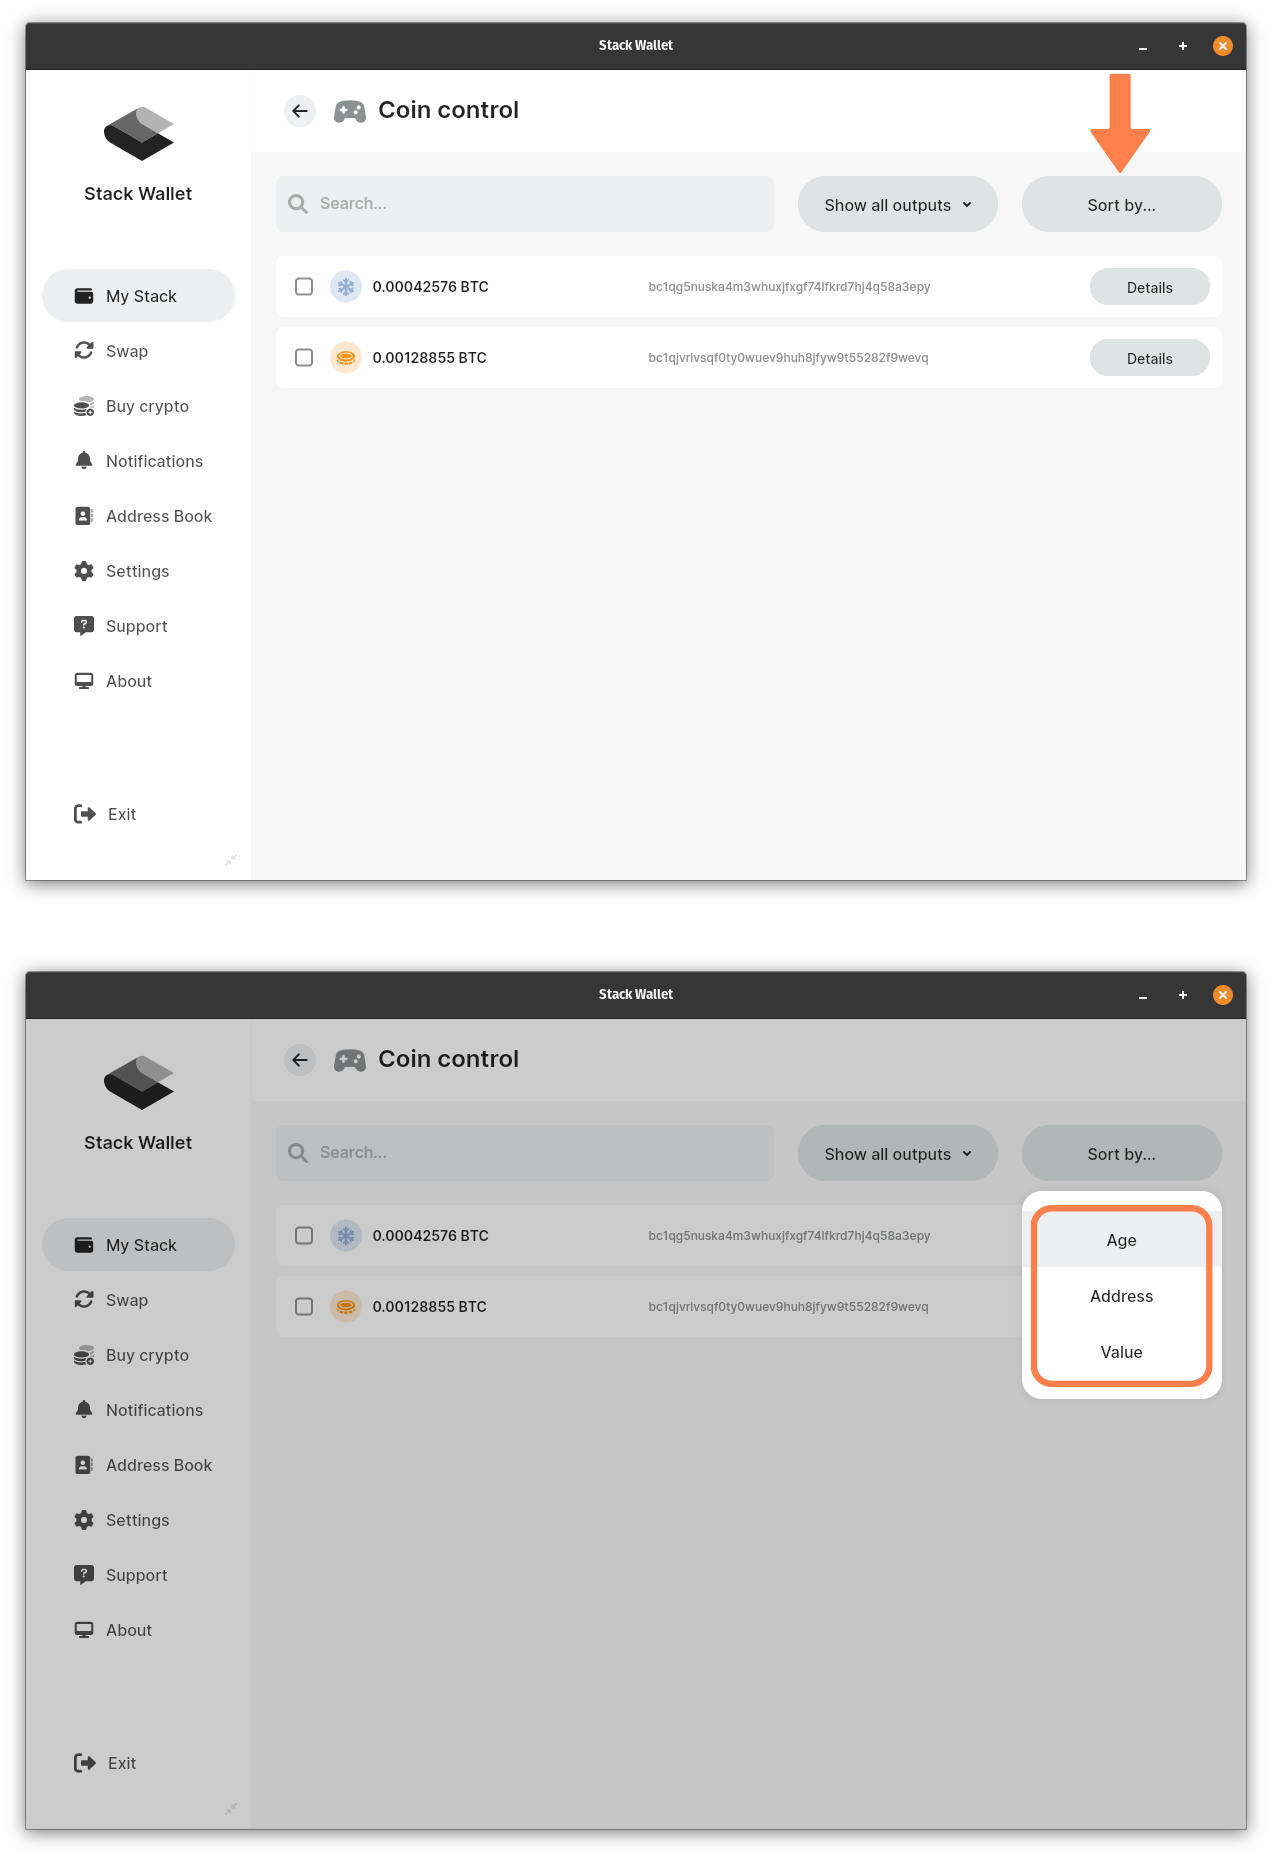
You also have the option to sort your outputs in several different ways. To try this, select the icon (3 lines) at the top right of the coin control page, then choose between sorting by the age of the output, its address, or its value.
Step 5
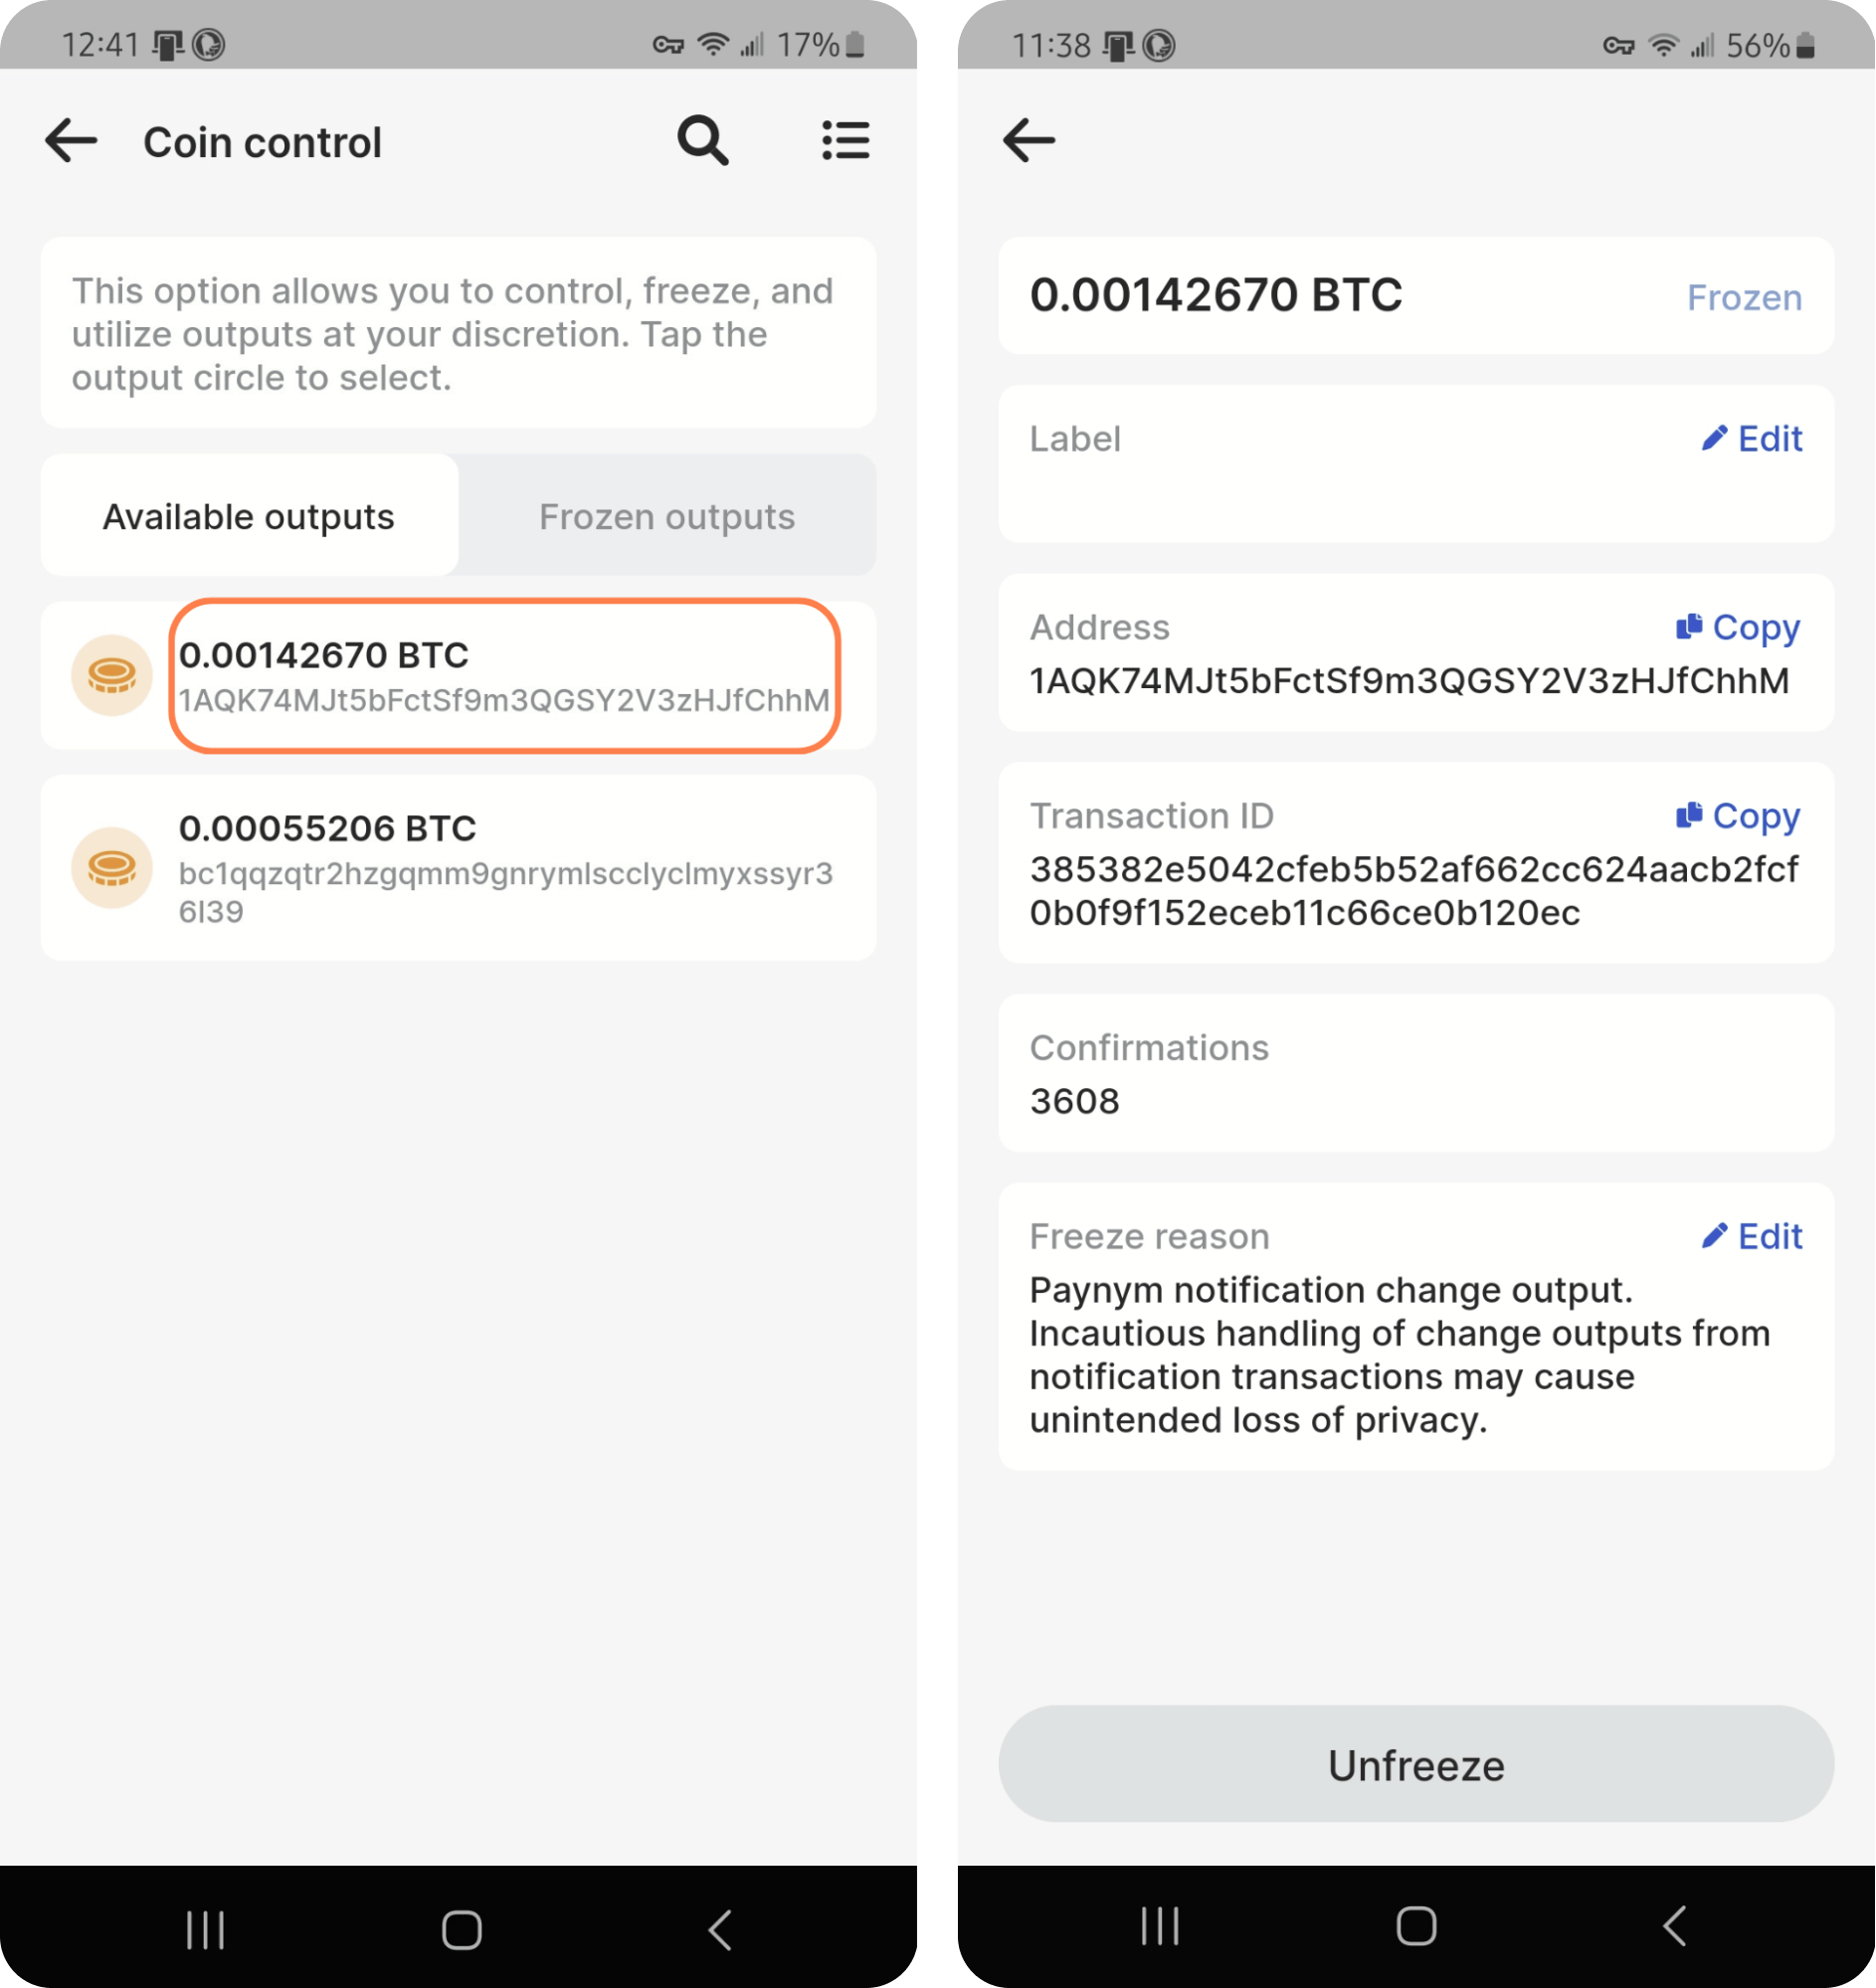
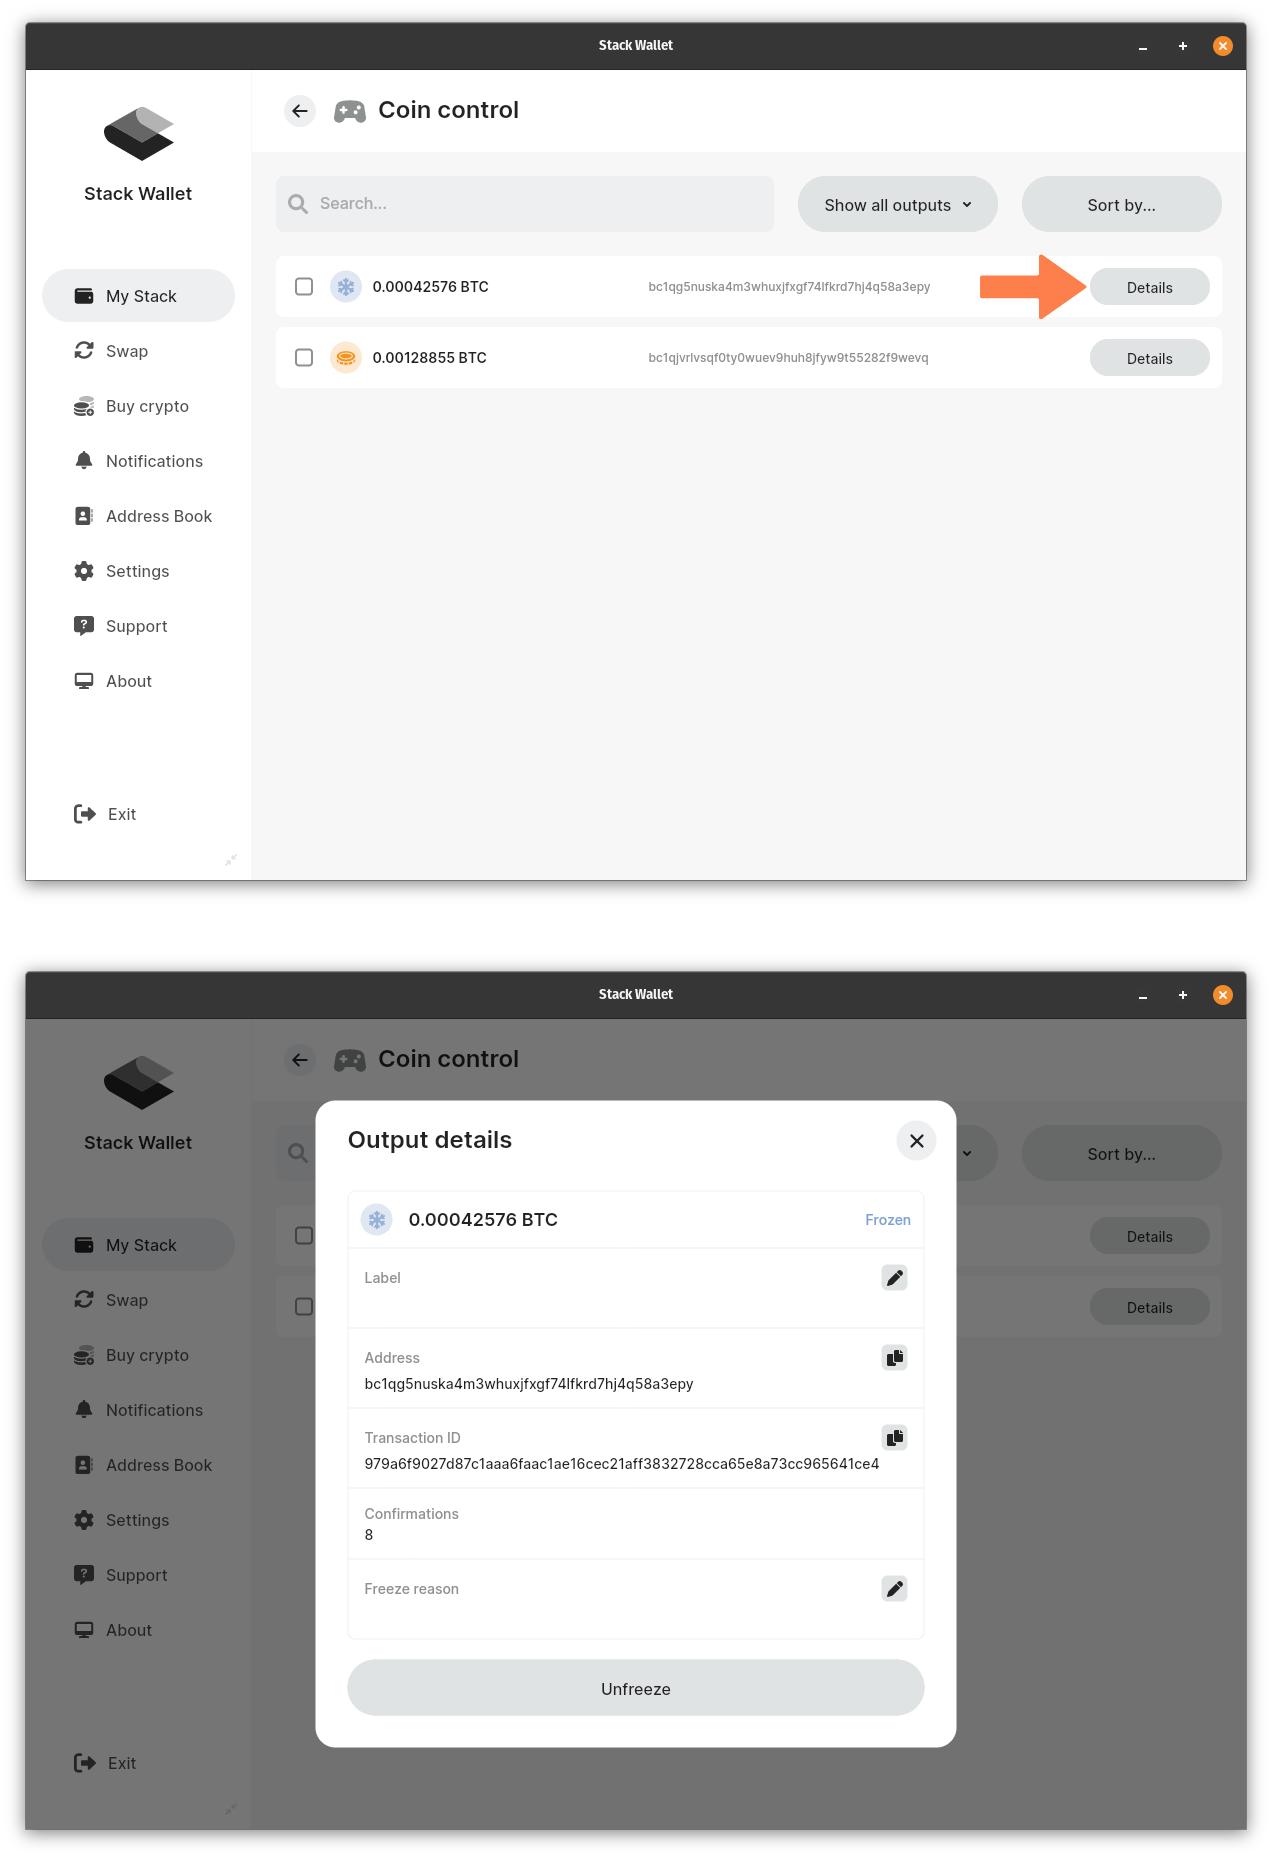
In order to see more detailed information about an individual output, simply touch or click on the amount itself. From there you will be able to view and/or edit its status, address, transaction ID, number of confirmations, and freeze reason (note: freeze reasons simply serve the purpose of describing why outputs were initially set aside as unavailable for spending). This last section may be autofilled with context from previous activity, but can always be customized to suit different circumstances.
Step 6
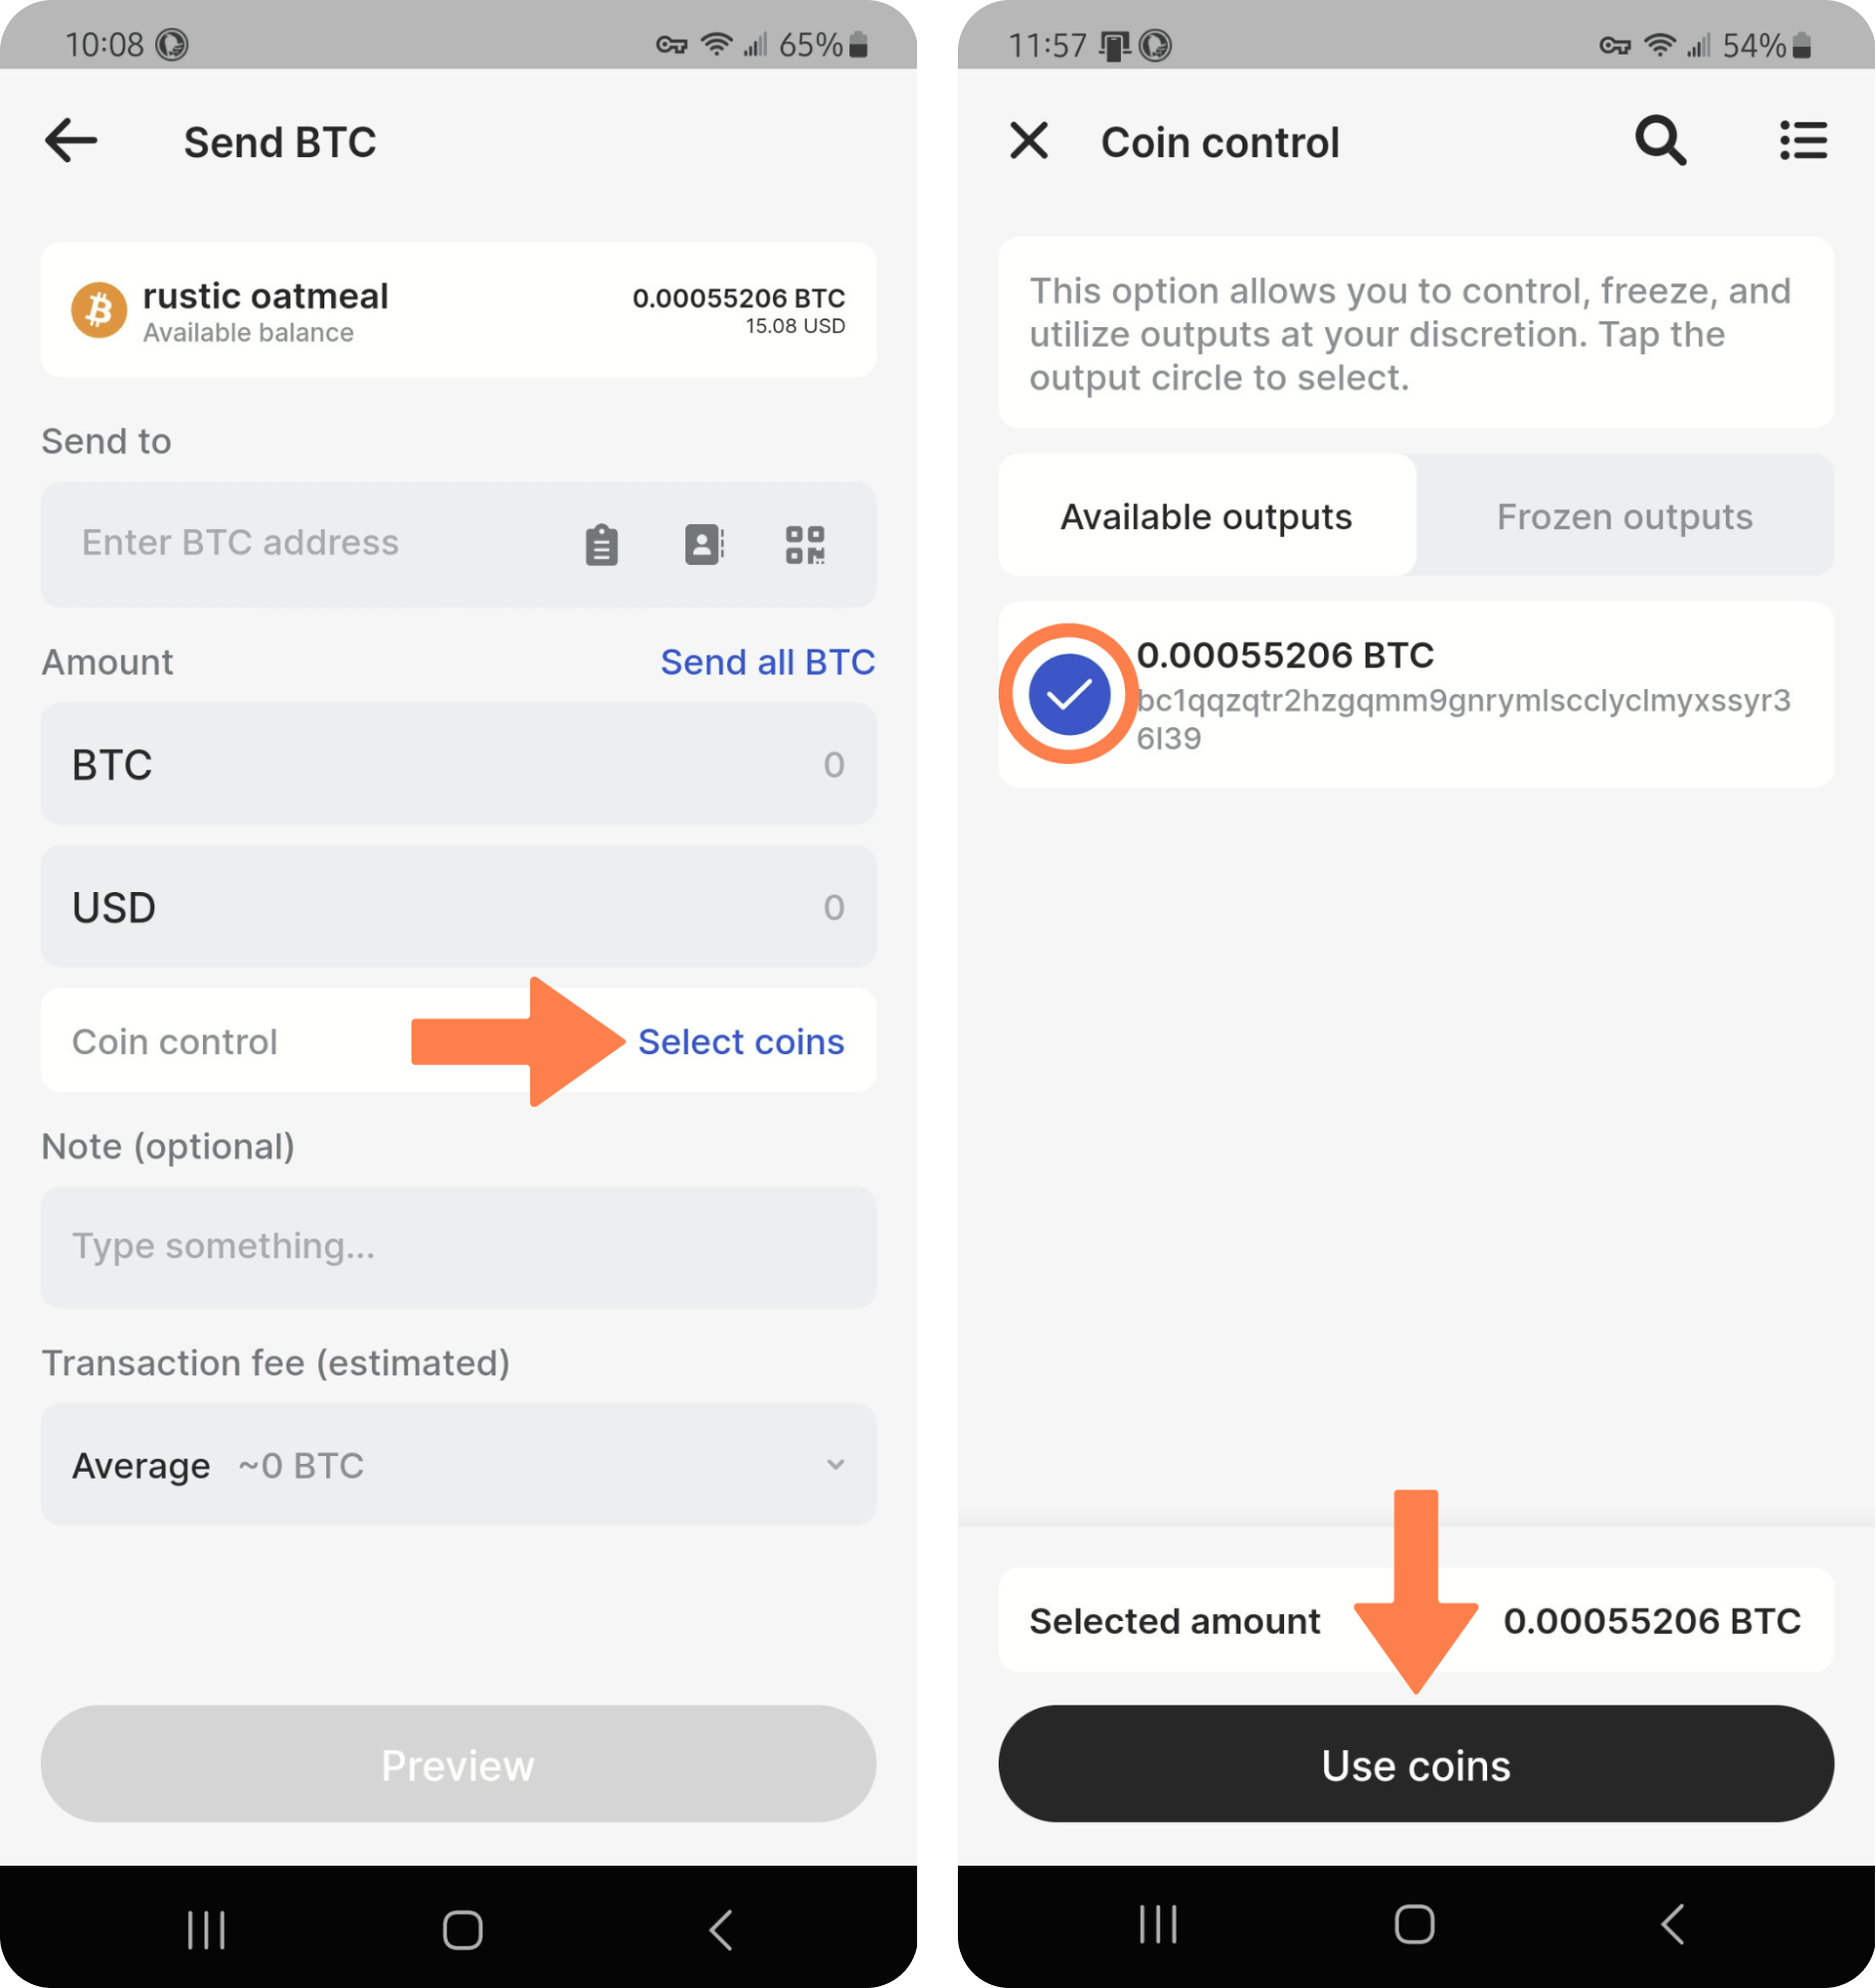
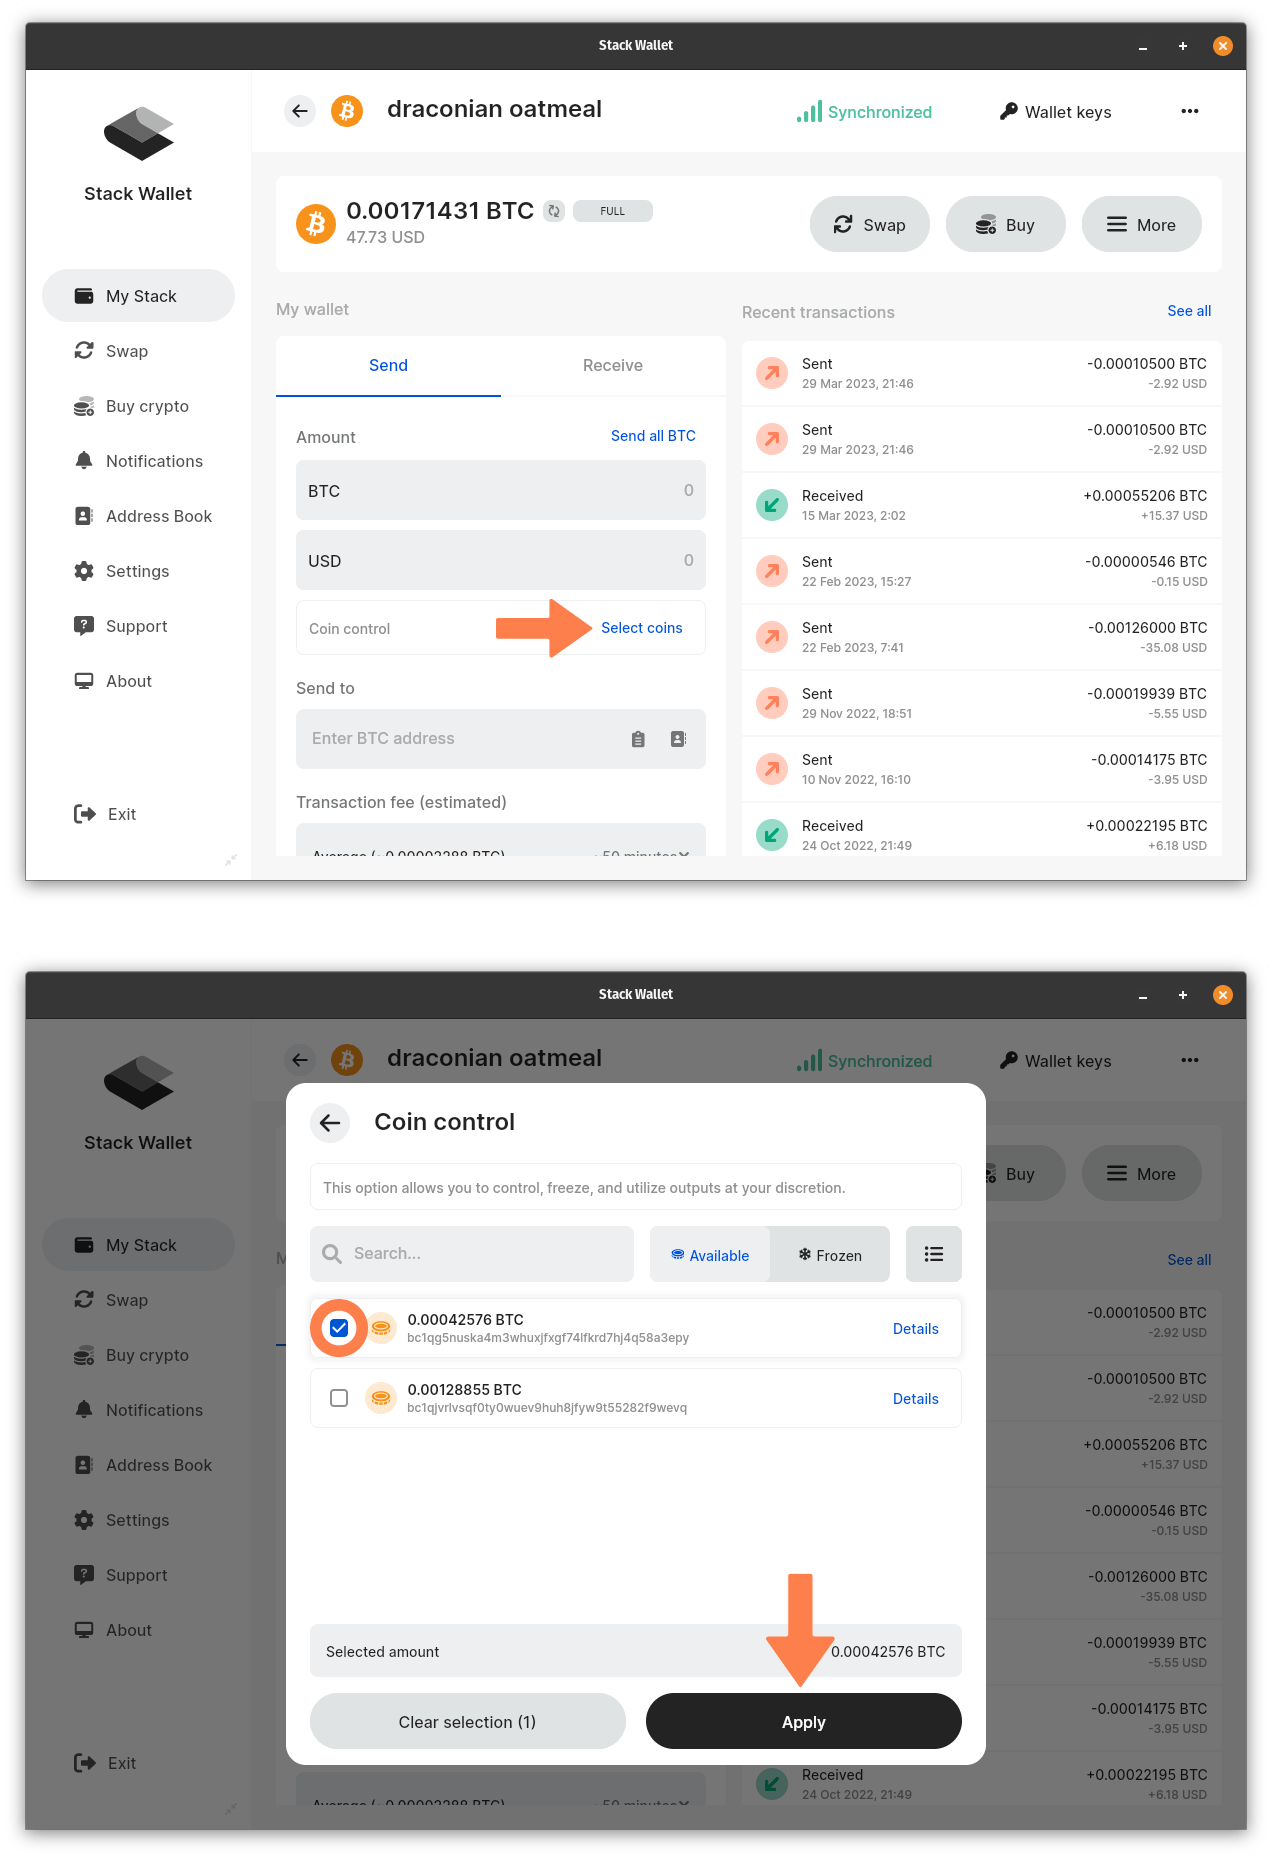
From this point, transacting with coin control turned on is a breeze. After you’ve chosen a wallet to use and initiated the sending process you may fill out all other forms as usual and underneath the amount to send, select Coin Control>Select Coins. This will bring you to a screen much like before where you have the opportunity to view your available and frozen outputs and choose which in particular to spend from.
Step 7
Then once you’ve made your selection(s), that’s it - you’re ready to send!
This is one easy-to-pick-up feature that puts further control of your funds into your hands. Try taking advantage of coin control when you #BuildYourStack with Stack Wallet!